The EVGA X299 Micro Motherboard Review: A Smaller Take on X299
by Joe Shields on February 9, 2018 9:00 AM EST- Posted in
- Motherboards
- Intel
- U.2
- X299
- Skylake-X
- Kaby Lake-X
BIOS
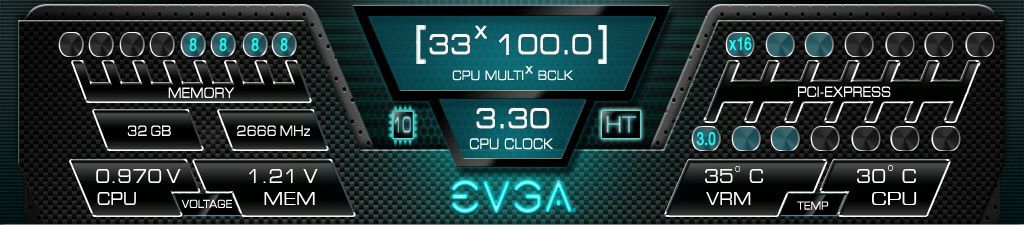
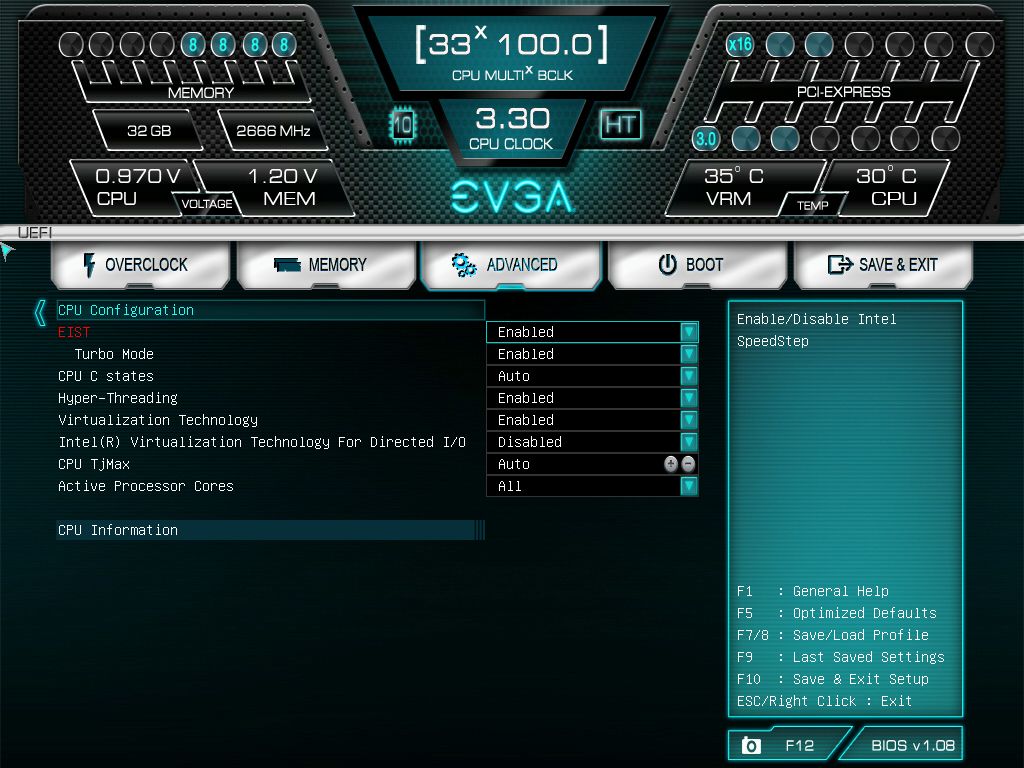
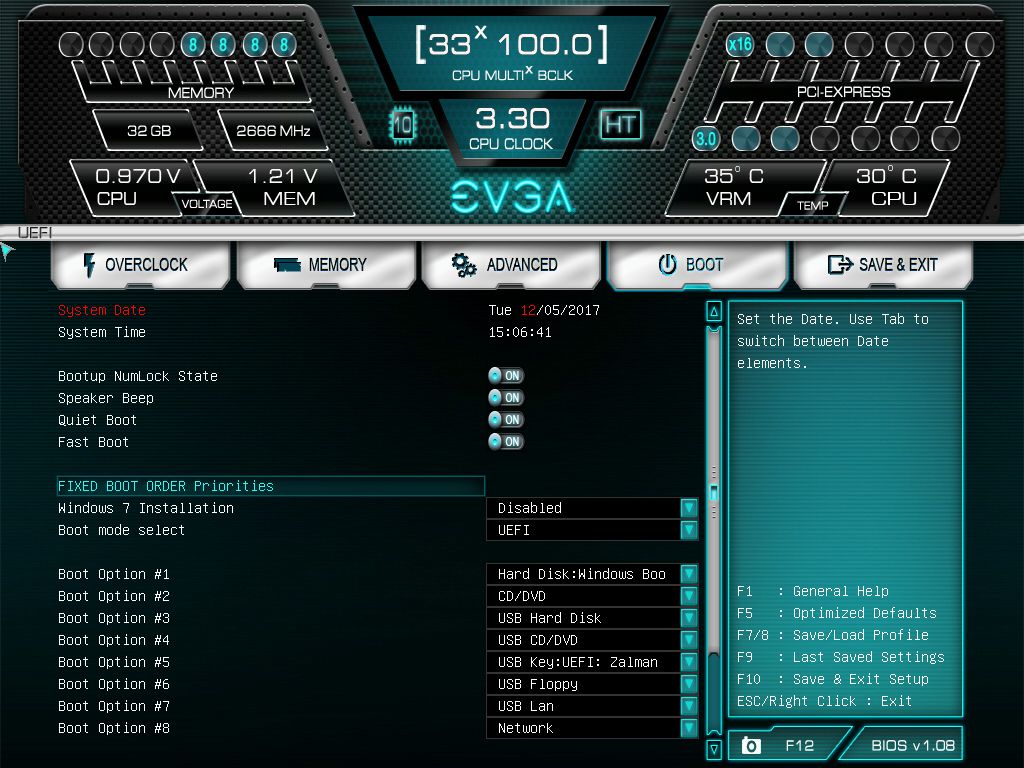
When entering the BIOS for the EVGA Micro, users are greeted by a split-screen with high-level information up top such as which DRAM slots are populated, the total amount and speed of memory, as displaying which PCIe slot(s) are in use, their mode, and bandwidth. Other information in the top 1/3 of the screen are bits about the CPU, the number of active cores, if Hyperthreading enabled, and voltages for the CPU, memory voltage, and VRM/CPU temperatures.
The bottom 2/3 is where we will be able to view and edit functions on the motherboard. One thing some astute readers may notice is a lack of an "EZ BIOS" screen. With EVGA boards, users jump right into the 'advanced' version of the BIOS and into the Overclocking tab. Across the top of this portion are five sections, Overclock, Memory, Advanced, Boot, and Save & Exit.
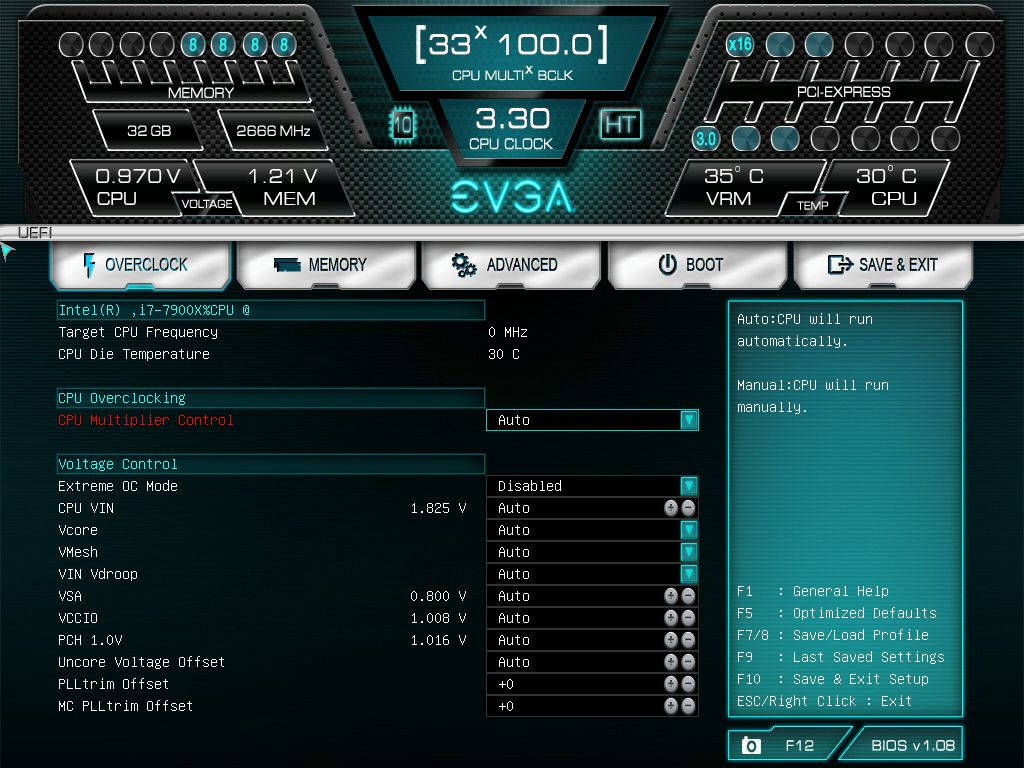

The Overclock section presents users with a multitude of options associated with overclocking. Items such as the CPU Multiplier Control, BCLK Frequency settings, and voltage domains, are located under this tab. The Micro has the options needed to overclock the CPU, however, it is missing custom LLC functionality to modify vDroop response, as well as any multi-core enhancement which many other boards have. After talking with EVGA they stated they are following the Intel specifications as far as boost on multiple threads.
The Micro, like the EVGA FTW K, reviewed earlier, is also missing power limit adjustments. This would be a concern if we ran into throttling during overclocking, but, we reached our 4.5 GHz clocks without issue. Also like the FTW K, when switching to manual mode, either Per Core or Ratio Limit, it automatically sets a negative AVX and AVX2 offset of 3. Whereas other boards allow the user to set this manually, this is pre-applied and cannot be swtiched off. The result of this setting if it isn't manually adjusted is slower performance on AVX based tasks.
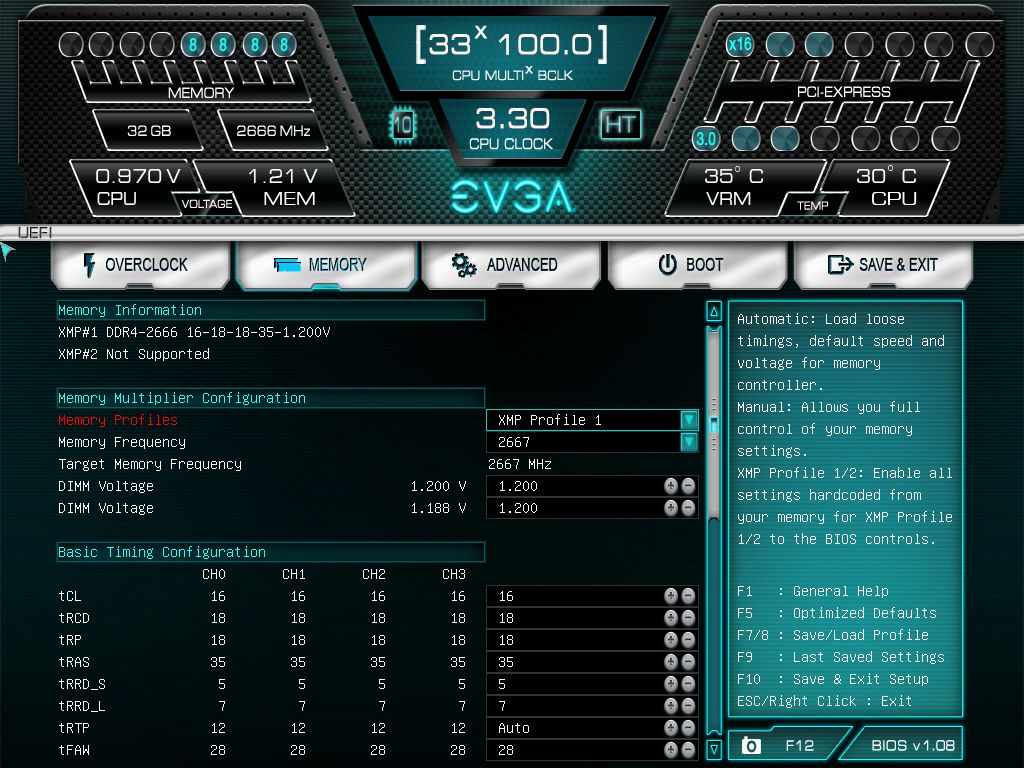
All memory options are found within the Memory Tab. This is the location where we are able to set XMP profiles as well as manually adjust the speed and timings. In the Memory Information section, it lists the XMP profiles available from the installed sticks which makes it easier to set the profile the user wants.
The official listed supported memory speeds on the Micro are the lowest for an X299 board we have seen, matching its big brother in this distinction. Also, like the FTW K, it does provide memory ratios to DDR4-4400, but we are only able to test up to DDR4-3600 with the set of sticks we have. Both sets of DRAM we have worked without a hitch using the XMP profile of DDR4-2666 or DDR4-3200.
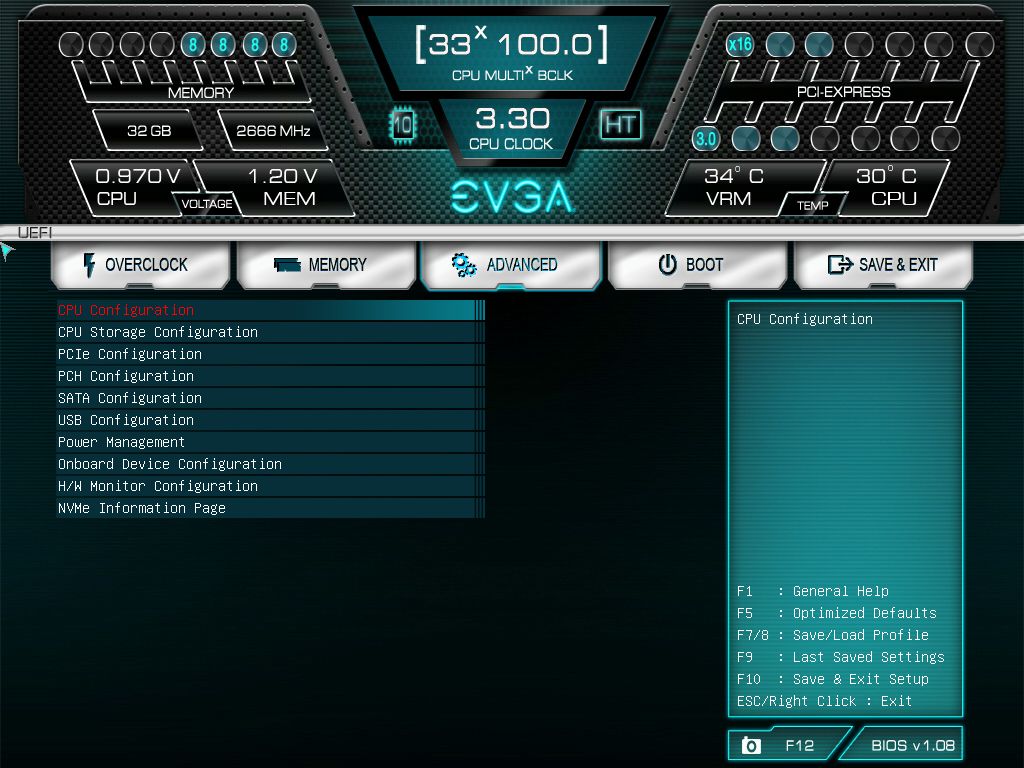

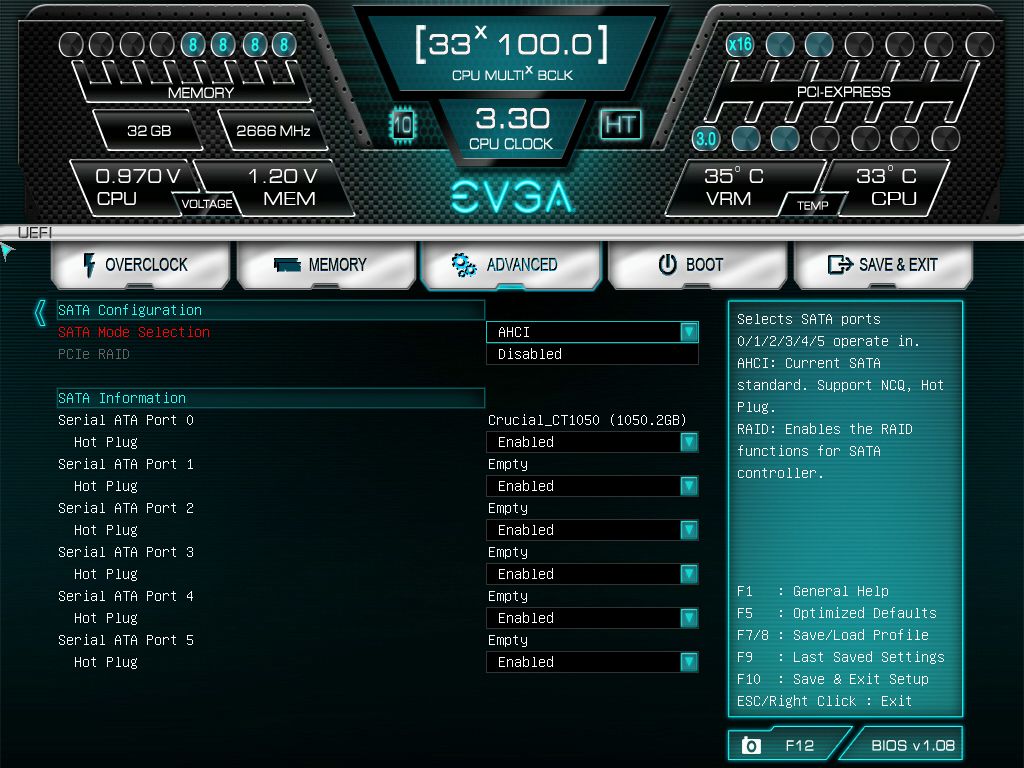
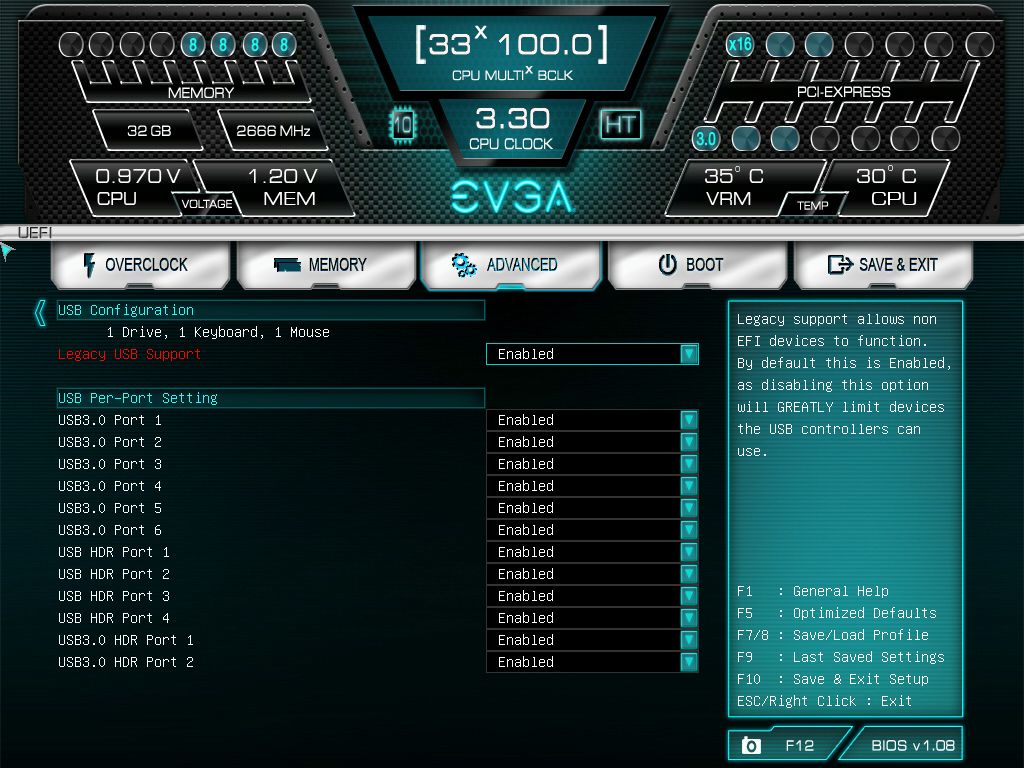
The next tab is labeled Advanced. Tis section is where low-level system adjustment can be made such as CPU manipulation, CPU storage, PCIe for bandwidth adjustments, PCH, SATA (enable and disable ports), as well as USB configurations can all be edited here. The Power Management section is a bit of a tease and has adjustments for enabling/disabling LEDs, ERP mode for EU energy savings, and sleep states. No options to adjust the power limits or adjust the Load Line Calibration can be found. The Onboard Device Configuration section users can enable.disable the LAN, Audio, USB 3.1 Controller, as well as M.2 and U.2 ports.
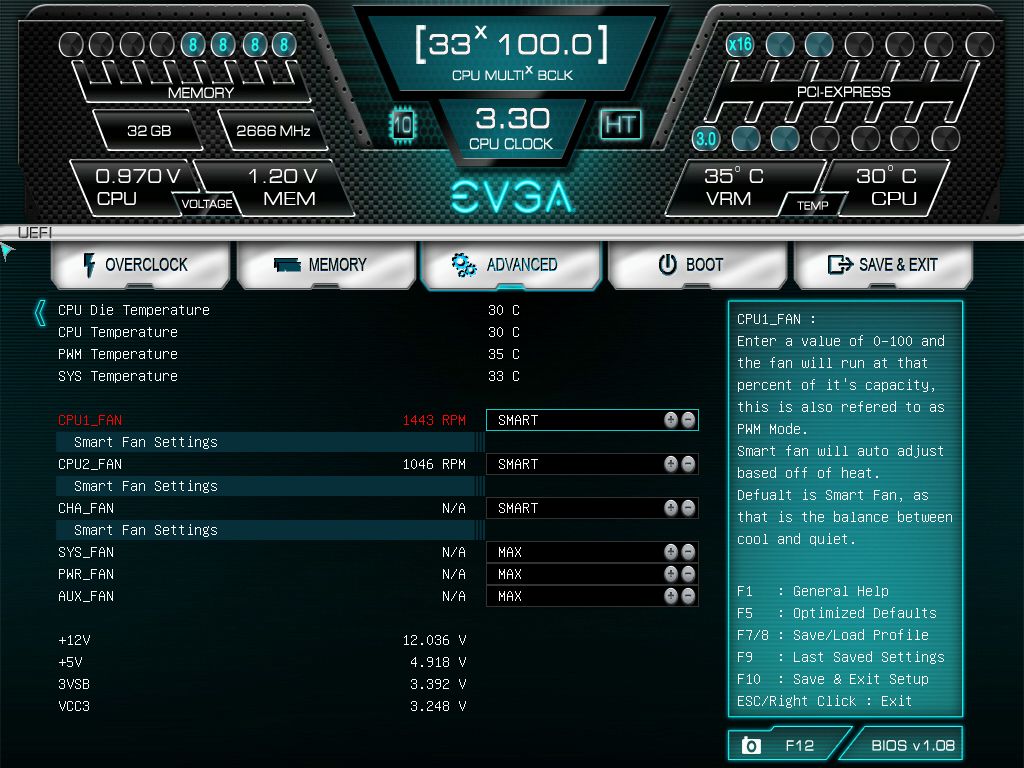
The H/W monitor configuration section is where system temperatures such as power delivery, motherboard, and the CPU temperature can be found. It also displays voltages from the power supply including the +12V, +5V, and 3VSB. Here we are also able to adjust fan speeds, however, it will have to be through pre-supplied auto options (Smart and Max), or through basic power percent values for fine control. This is an aggrivatingly bad way to represent fan control, as fan response is far from linear with respect to power. The two CPU fan headers are PWM control only while the remaining chassis/system fans are able to use both PWM and DC control. 
Boot Order, Numlock State, and Fast Boot are some of the options found on the Boot tab. There are options for a Windows 7 installation, boot mode select, as well as a list of boot options to change.
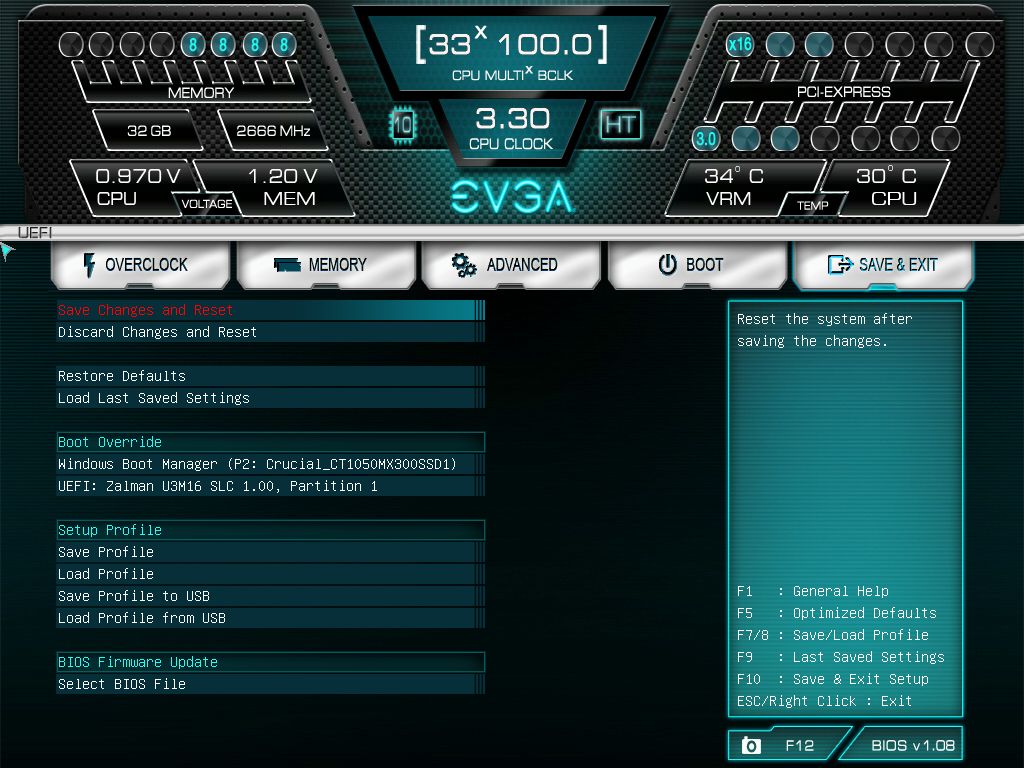
Last is the Save & Exit tab where we are able to restore defaults or load the last saved settings. Also in this section is where users are able to save BIOS profiles internally or to a USB stick as well as updating the BIOS. Boot override is also present, which is a positive.
Overall, the EVGA Micro BIOS worked fine outside of some issues with a cold boot. It would POST, then give five long beeps and throw a d6 debug code. Occasionally it would work through it and boot to an OS, while other times it would hang there repeatedly. When I first received the board, I was unable to boot and it was difficult to get into the BIOS as fast boot is enabled by default which did not leave a lot of time to reach the BIOS. Once I was able to get into it, I upgraded the BIOS to 1.08 (latest on their website at the time). This allowed me to get in and boot without issue, however, it still sends five long beeps as if there was a problem and then it boots. Our initial thought it has something to do with memory training. We have reached out to EVGA who is looking into it.


Software
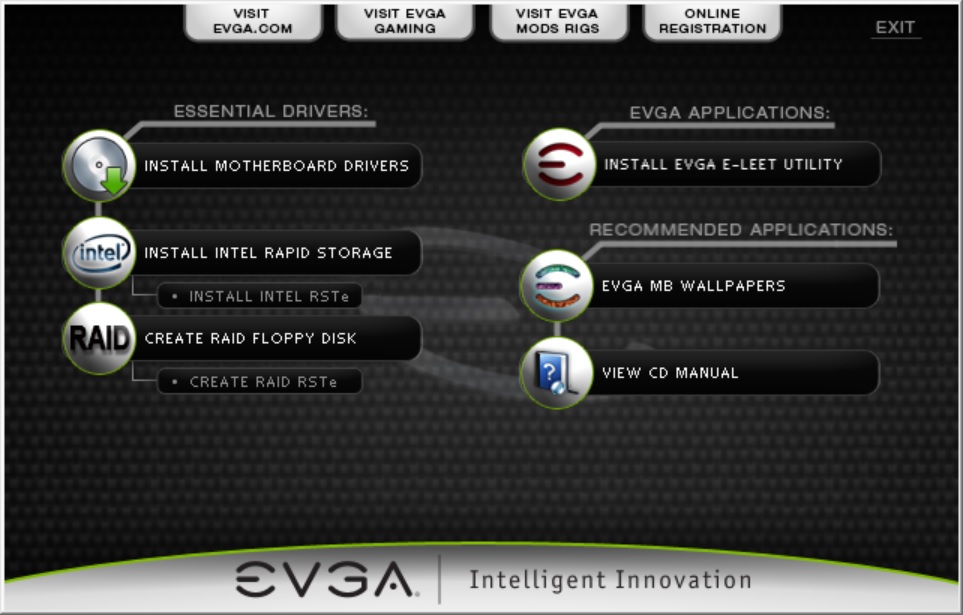
The included driver disc contains all the basic drivers. This includes the Chipset, ME, LAN, Audio drivers, amd also EVGA's sold software package, the E-Leet utility. I used the disc to install the motherboard drivers without issue. One item I would like to see added to help the average user is an automatic update program. Because the Micro doesn't have one, users will have to go to the EVGA website and manually look for updated drivers. Enthusiasts may prefer this method, particularly in this day and age of automatic updates, but for most it would welcome such an addition, which other motherboard manufacturers have been using to their advantage.
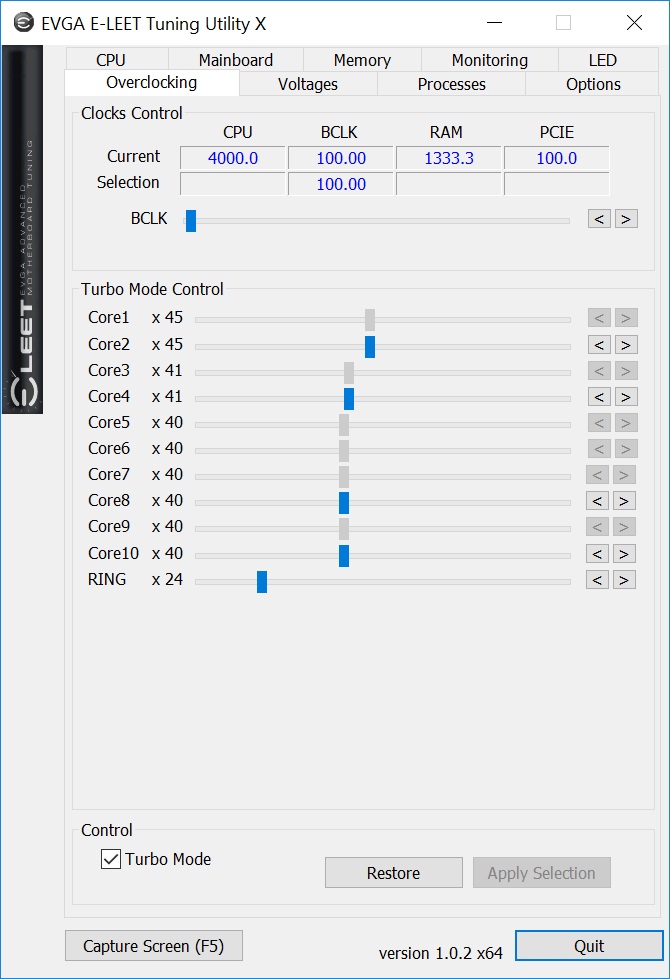
The E-Leet Tuning Utility X is a windows based application used for monitoring the system, overclocking, and if the board supports it, changing LED effects. The first three tabs, CPU, Mainboard, and Memory, are informational only covering details about each part. They look a lot like the same tabs in CPU-Z, in fact.
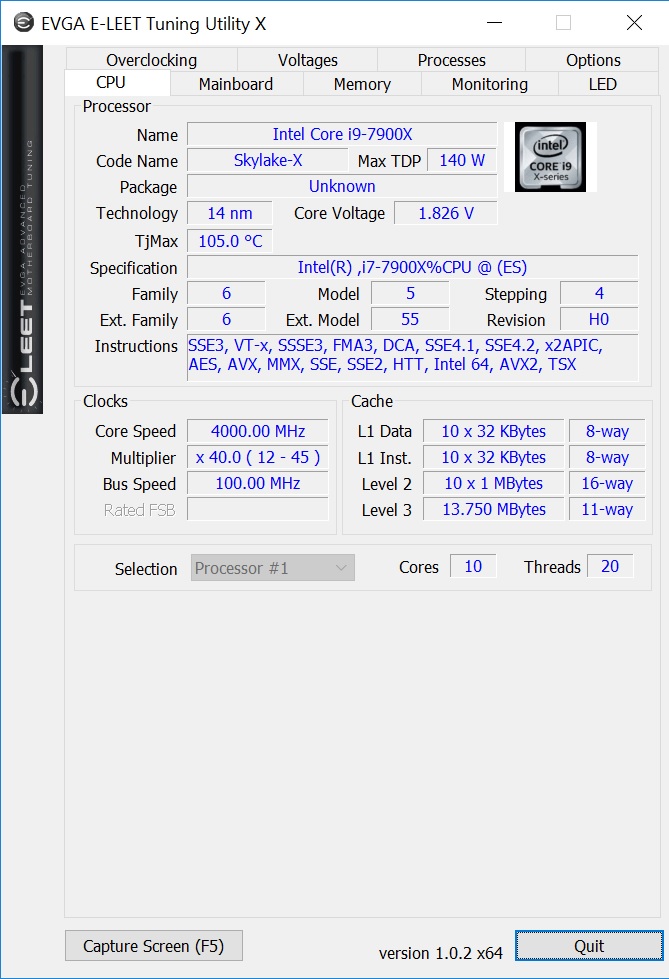
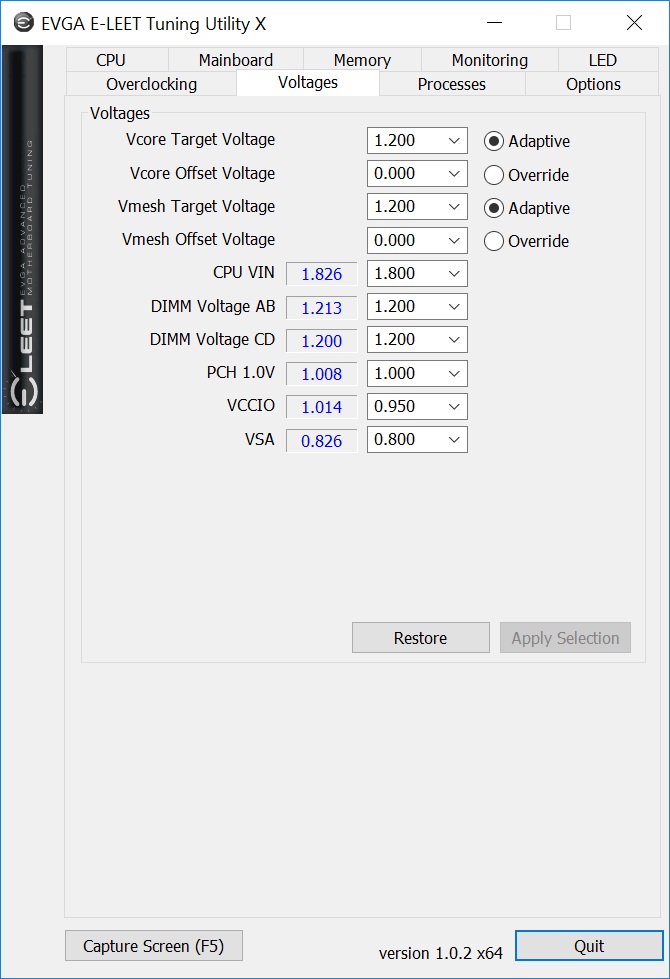
Below are images of the overclocking and voltage sections. These tabs are where adjustments for overclocking such as CPU Multiplier, Ring, BCLK, and voltage adjustments will be managed. The BIOS settings for the CPU multiplier determines which cores are able to be adjusted. A Per Core ratio will lead all to be individually configured, while the Ratio Limit is a 'one slider controls all' situation.
The E-Leet Utility worked without issue on the Micro. The issues I had on the FTW K, freezing when DRAM was set manually from the BIOS, were not present.
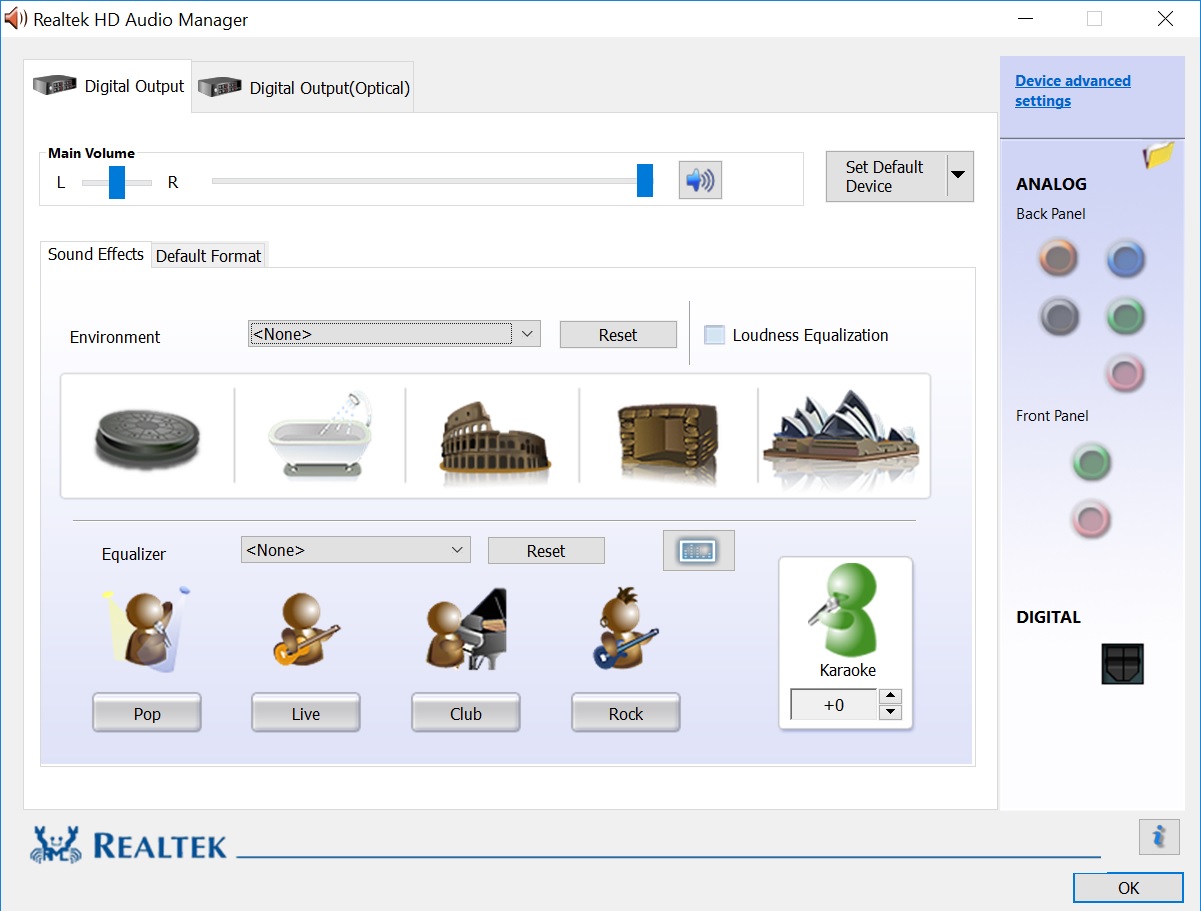
The EVGA Micro uses the ALC1150 codec for audio processing which is the high-end codec from the previous generation, which has since been superceded. The Micro, like the FTW K, uses the Realtek HD Audio Manager for audio tweaking and does not offer additional software on top of it.


23 Comments
View All Comments
casteve - Friday, February 9, 2018 - link
"This showcases one of the downsides of a HEDT system: while other platforms (like Z170) were getting under 100 regularly, the additional featureset of these large platforms results in a higher DPC Latency."I don't think it's the feature set. It just showcases that Intel failed to optimize for DPC latency with this chipset. eg: z77 good dpc latency, z87 bad, z97 and 170 good... sometimes Intel is on the ball, sometimes it isn't.
jabber - Friday, February 9, 2018 - link
Excellent, a X299 board for the over 25's!wolfemane - Friday, February 9, 2018 - link
Hey some of us over 25's are kids at heart... and have kids. I love RGB. I'd happily add RGB to a system with this board.DanNeely - Friday, February 9, 2018 - link
OTOH even at 18 I'd've probably been like "Really?!?!?" Other than being brushed aluminum when that was still far from common the case I used for the system built right after my 20th was mundane as they come.Samus - Saturday, February 10, 2018 - link
Ditto. Even when I was a teenager I preferred the look of my corporate-class Prolinea or industrial design of a boxy Lian-Li to something with a window and lights. The most adventurous thing I've done is put a LED in my water pump so I can tell when the coolant is flowing.peevee - Friday, February 9, 2018 - link
Isn't having only 2 memory slots defeats the purpose of X299-compatible CPUs?DanNeely - Friday, February 9, 2018 - link
It has 4, 2 on each side. It's still quad channel so you get the double bandwidth vs the mainstream dual channel CPUs. You're still down 50% on capacity; but between the larger socket size of LGA20xx (AMD Epyc with a ~3500 pin socket is even worse, to the extent that something like half the board for it are the even larger E-ATX form factor that's rarely been used outside of 2 socket boards in the past) and all the extra stuff the bigger CPUs can support there's not enough space on the PCB to do everything that the CPU itself could do on anything smaller than a full ATX. Micro ATX with these CPUs requires picking and choosing what features you need instead of just taking everything.Samus - Saturday, February 10, 2018 - link
Basically, if you need more than 32GB of memory, you are better off spending more on a bigger board because the cost of high-density DDR4 will effectively kill any cost savings. ie, 4x8GB DIMMs are substantially cheaper than 2x16GB DIMMs.cosmotic - Friday, February 9, 2018 - link
On the first page: "This specific review will cover the ASRock X299E-ITX/ac." (probably pasted from said review to this one, which is for an EVGA board)Joe Shields - Monday, February 12, 2018 - link
Updated.