Original Link: https://www.anandtech.com/show/5307/windows-8s-storage-spaces-detailed
Windows 8's "Storage Spaces" Detailed
by Andrew Cunningham on January 6, 2012 4:30 PM EST

Windows 8's new Storage Spaces functionality will easily allow users and system administrators to pool different physical drives together into one logical drive, writes Rajeev Nagar on the Building Windows 8 blog. This functionality, which is similar in some ways to the now-discontinued Windows Home Server Drive Extender, will allow drives of any capacity connected to a PC by USB, SATA, or SAS interfaces to be seen by the OS as one large drive.
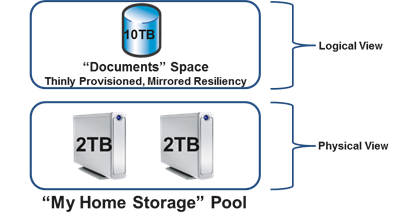
Once you've created a storage pool using two or more drives, you can then set up one or more "spaces" that will be seen by the operating system as a logical drive which can be formatted, partitioned, and used just as a physical disk would be. To provide redundancy, you can either apply the "mirrored" attribute to your pool, which makes sure that a copy of every file in the pool is stored on at least two different physical drives, or the "parity" attribute, which uses some drive space to store redundancy information - in the event of drive failure, this information is used to rebuild your pool and enforce mirroring. Microsoft notes that while the two redundancy options are similar, the "parity" attribute is best used for large sequential files or less-frequently-accessed content, since it has a higher random I/O overhead.

When creating a new Storage Space, you can specify a maximum size larger than the amount of available physical space - the system will prompt you when the storage pool needs more drives to work with. Microsoft calls this "thin provisioning," which means that drive capacity is only reserved as you store data to the drive rather than all at once. You can also expand the maximum size of the Storage Space at a later point if necessary. Creation of these spaces can be scripted using PowerShell.
For an in-depth look at how this technology works (and a FAQ which answers, among other questions, some inquiries about its similarities to and advantages over RAID), check out the full post using the link below.
Source: Building Windows 8 Blog


