ASRock X99 WS-E/10G Motherboard Review: Dual 10GBase-T for Prosumers
by Ian Cutress on December 15, 2014 10:00 AM EST- Posted in
- Motherboards
- IT Computing
- Intel
- ASRock
- Enterprise
- X99
- 10GBase-T
The ASRock BIOS and software has changed little since our review of the ASRock X99 WS, and hence is updated here with the WS-E/10G specific information.
ASRock X99 WS-E/10G BIOS
The ASRock BIOS shifted slightly between Z87 and Z97, and it is the Z97 implementation we get on X99. This means the starry background is gone, replaced with a dark and blue-crystalline image. The icons are also reduced to mere text with a small image and the menu sections are of equal size which I prefer. There is also an adjustment to the OC Tweaker layout, which we will come to.
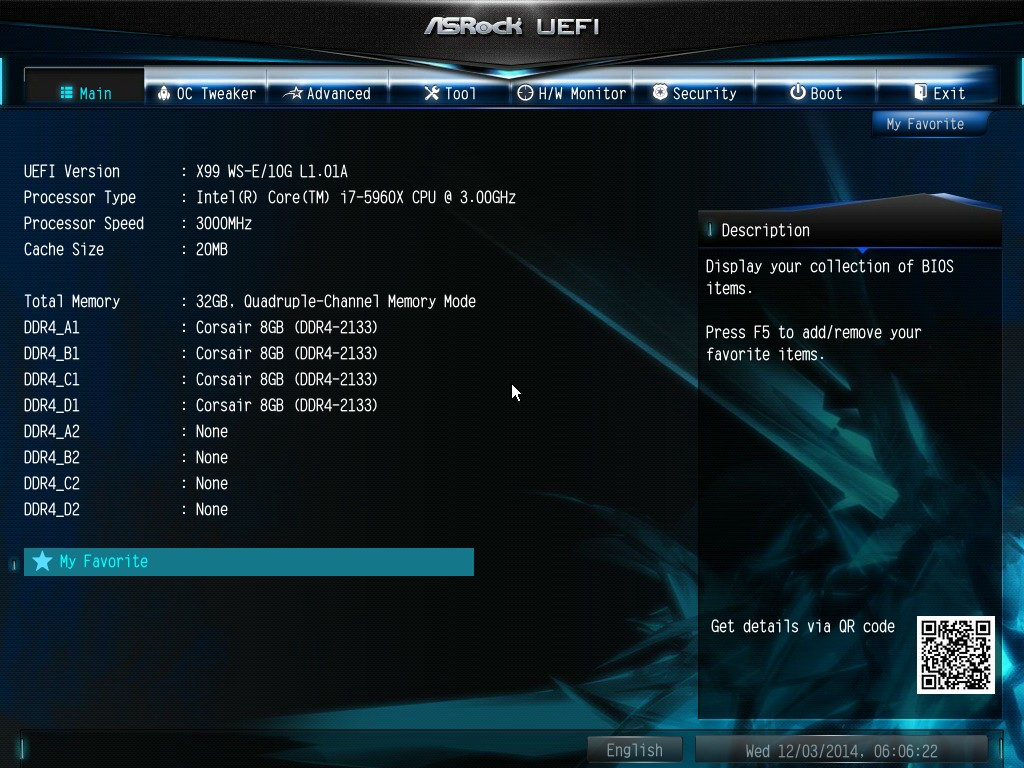
There is no ‘Easy Mode’ for the ASRock BIOS, with entry direct into this first Main screen. The right hand side of the BIOS is for description of the option selected, and the main segment shows information such as the BIOS version, CPU installed, CPU speed and memory installed. As mentioned in previous reviews, having some set of information relating to CPU voltages, temperatures and fan speeds might be useful here. If ASRock was to do an Easy Mode, it would make sense to have a one-button overclock option as well.
OC Tweaker takes heed of one of my previous complains about the ASRock overclock options. Previously there used to be a long list of options that continuously grew, depending on what options were left open to the user. For X99, ASRock has condensed these options into separate submenus similar in design to those we see on a GIGABYTE motherboard. Note that ASUS and MSI BIOSes currently go half-way between these extremes, offering some basic options with the more advanced ones in separate menus.

ASRock cuts straight to the chase – the first two options deal with overclocking. We have touched on features like Multi Core Enhancement many times previously, but it is interesting to have it so high up on the list of options. The Optimized CPU OC Setting gives some easy selections for overclocks based on ASRock’s internal testing:
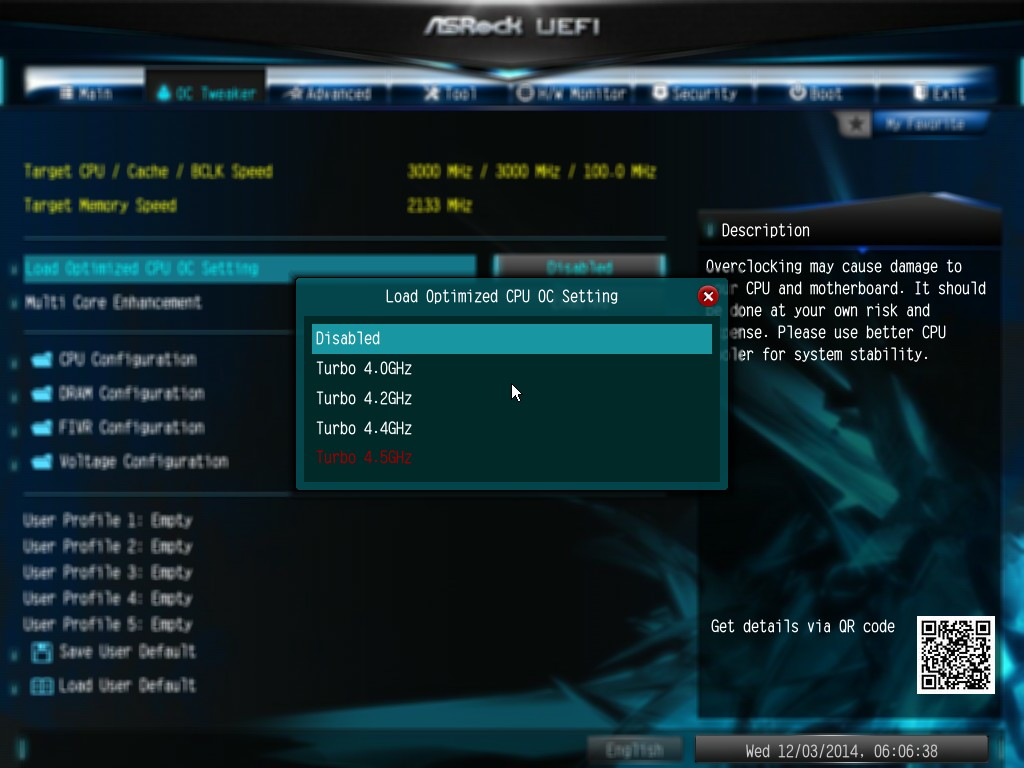
In line with our overclock testing, 4.0 GHz and 4.2 GHz should be achievable by all CPUs, with 4.4 GHz by most and 4.5 GHz by around half, given sufficient cooling methods.
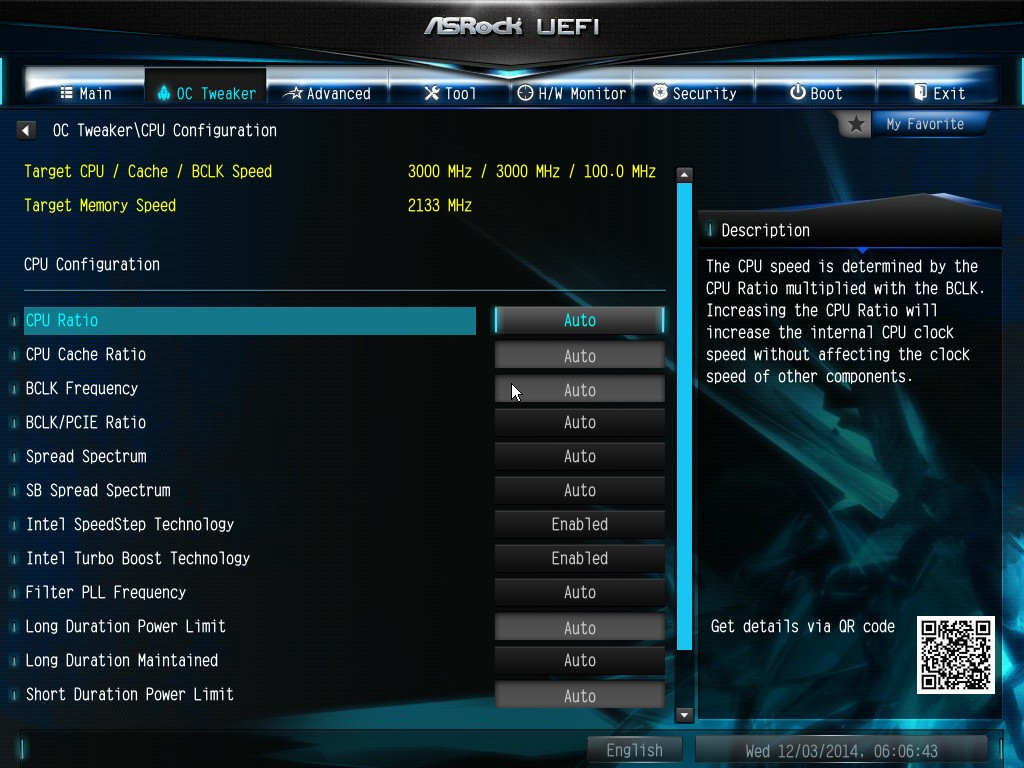
The OC Tweaker menu is split into four sections. CPU Configuration gives options for CPU Ratio, multiplier, frequency, turbo boost and power limits:
DRAM Configuration allows for XMP application, DRAM strap adjustment, DRAM voltage and sub-timing adjustment, all the way through primary timings, secondary timings, tertiaries and others.
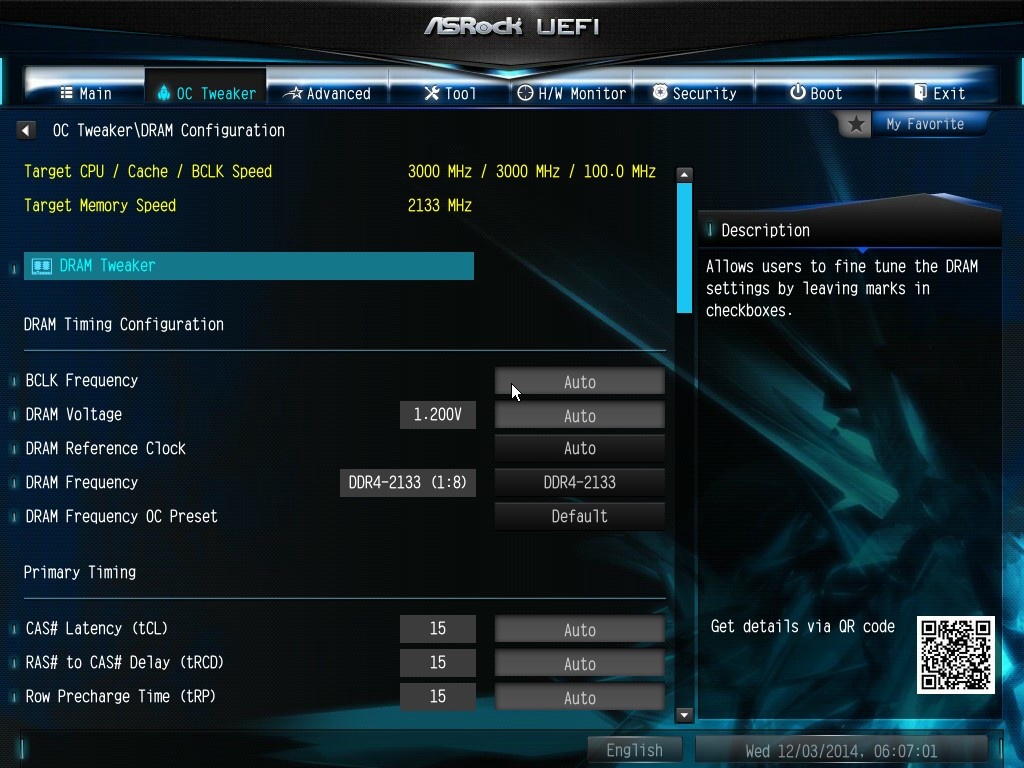
ASRock still uses the DRAM Tweaker function to fine tune the JEDEC and XMP responses to each memory kit. The ASRock BIOS also offers a DRAM Frequency overclocking preset list which will adjust the CPU strap and BCLK frequency needed to achieve various speeds.
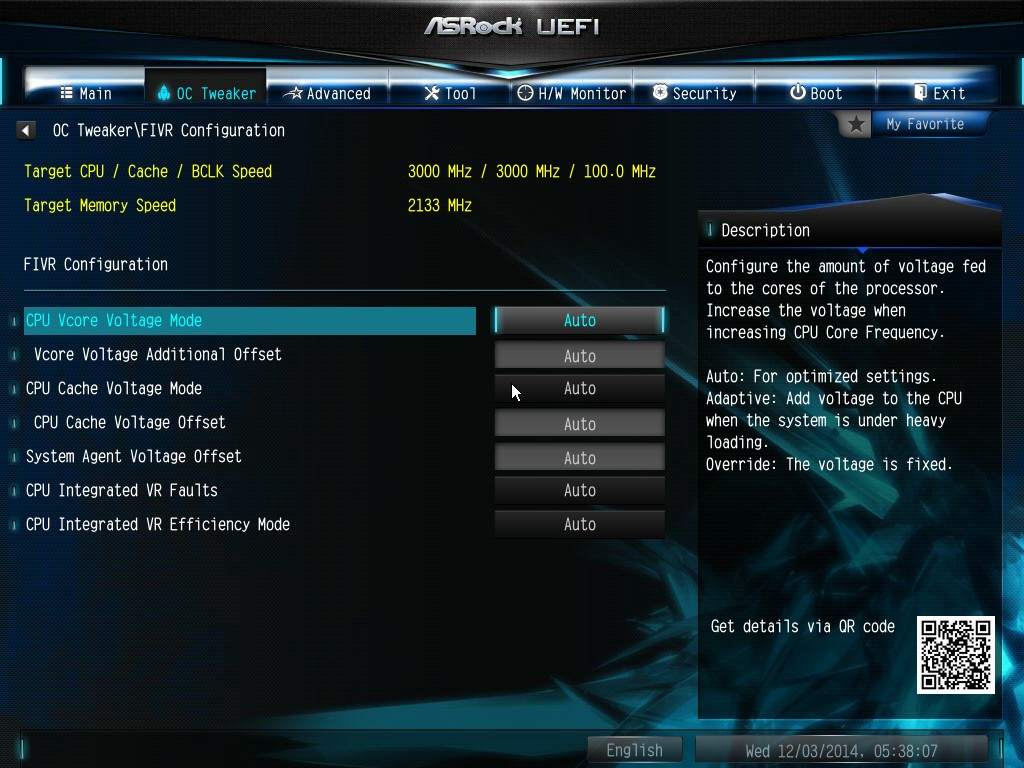
The FIVR Configuration menu from the OC Tweaker page deals primarily with the CPU and CPU Cache/uncore voltages.
The Voltage Configuration menu has the other voltages on the system, including VCIN to the FIVR and load line calibration. The Load Line Calibration option also comes with a handy graph showing what each setting means:
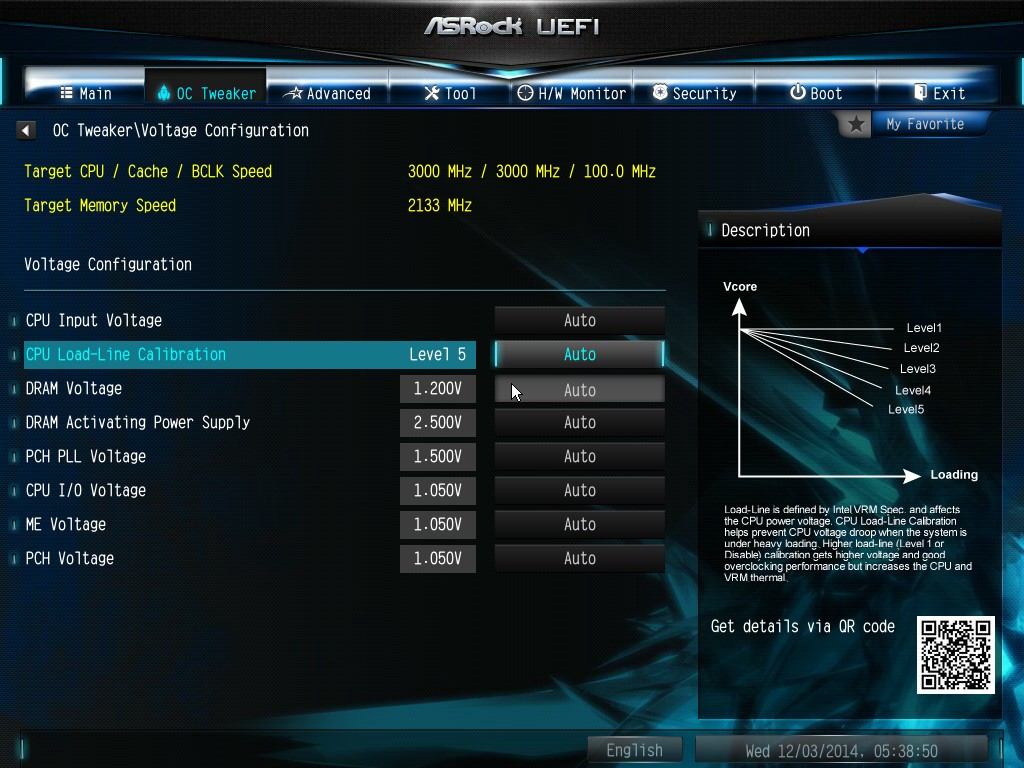
Unfortunately this arrangement of voltages is mildly confusing. Typically an overclocker will adjust the CPU voltage and the Load Line Calibration settings enough to get the right combination, and ASRock has placed these options in two different menus. If the CPU VCore option could be duplicated in the Voltage Configuration menu, this would be preferable.
The Advanced tab deals with other elements of the system configuration, such as the chipset, storage and super IO calibrations. This includes fixing power modes, PCIe linking speeds, disabling or enabling onboard controllers and adjusting RAID configurations.
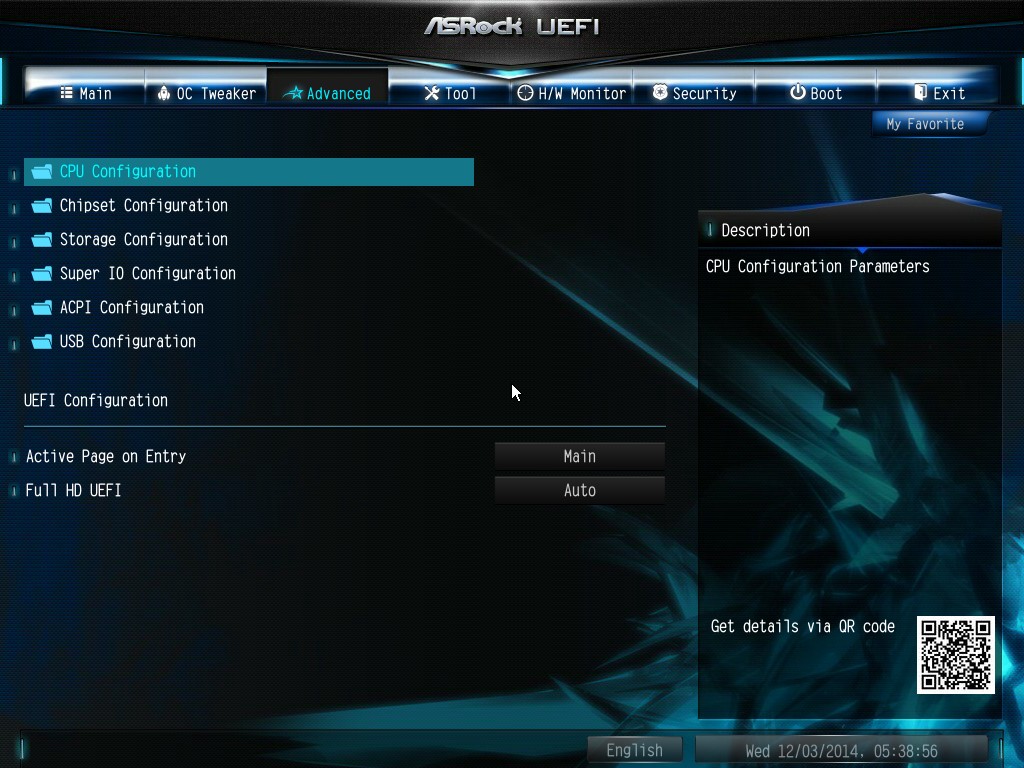
An adjustment to the X99 WS BIOS is that the Active Page on Entry setting has been moved here.
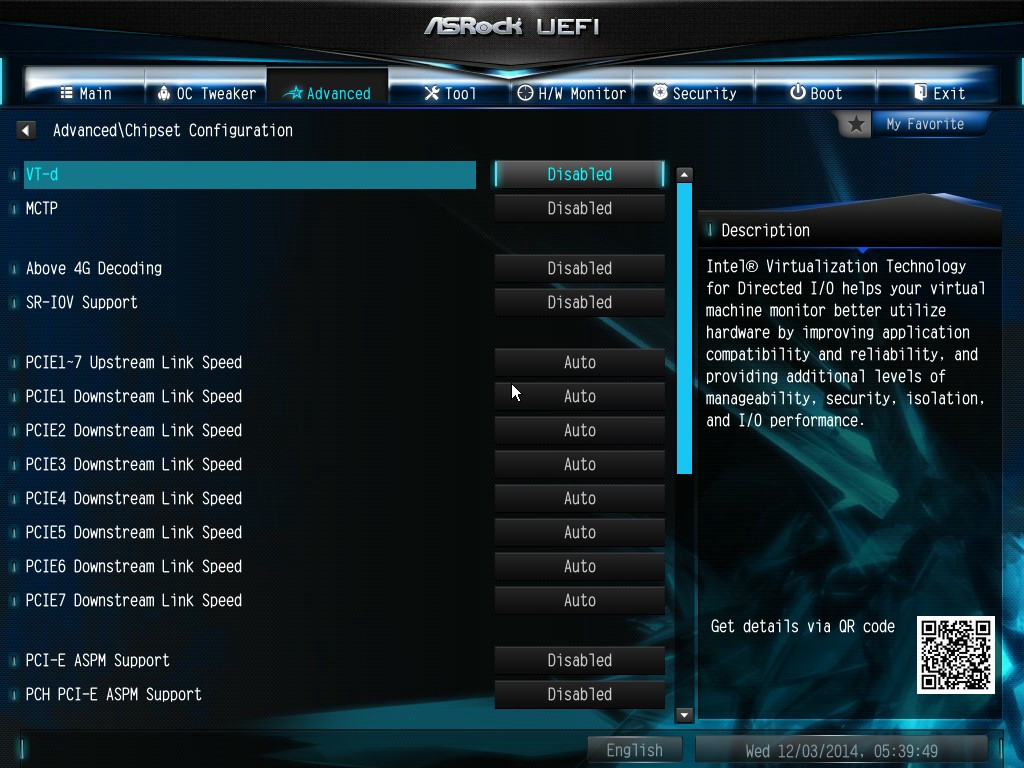
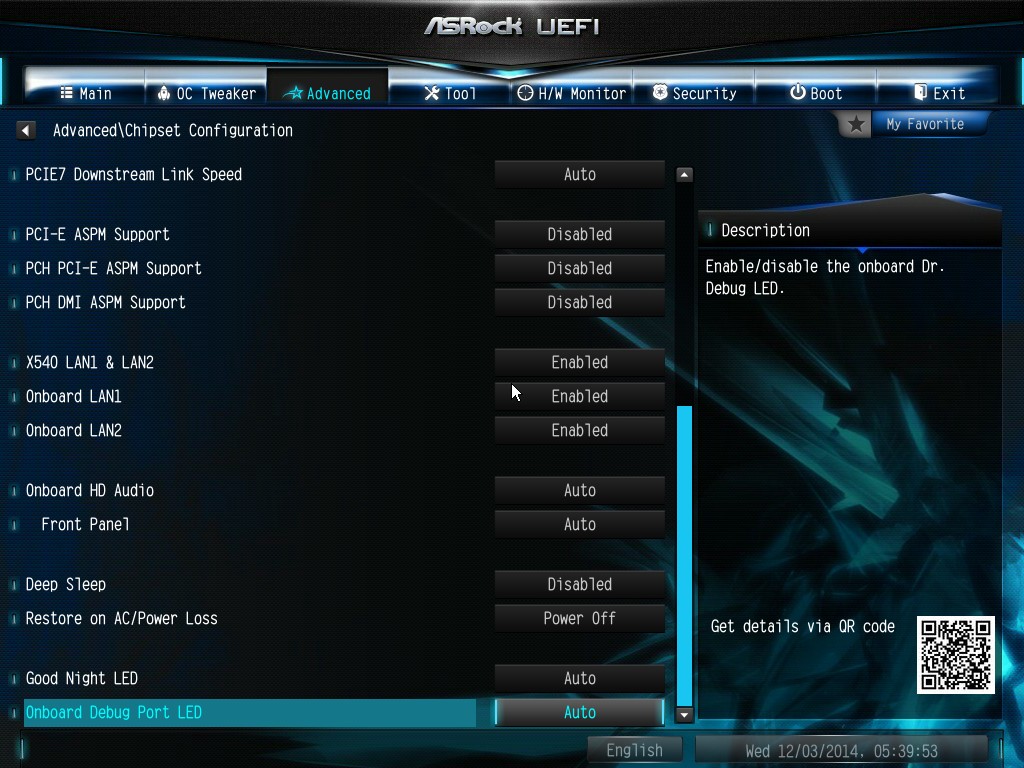
By default the ‘Above 4G Decoding’ is disabled, and I am surprised not to see an option here to enable the Thunderbolt header as is typically present in TB capable products.
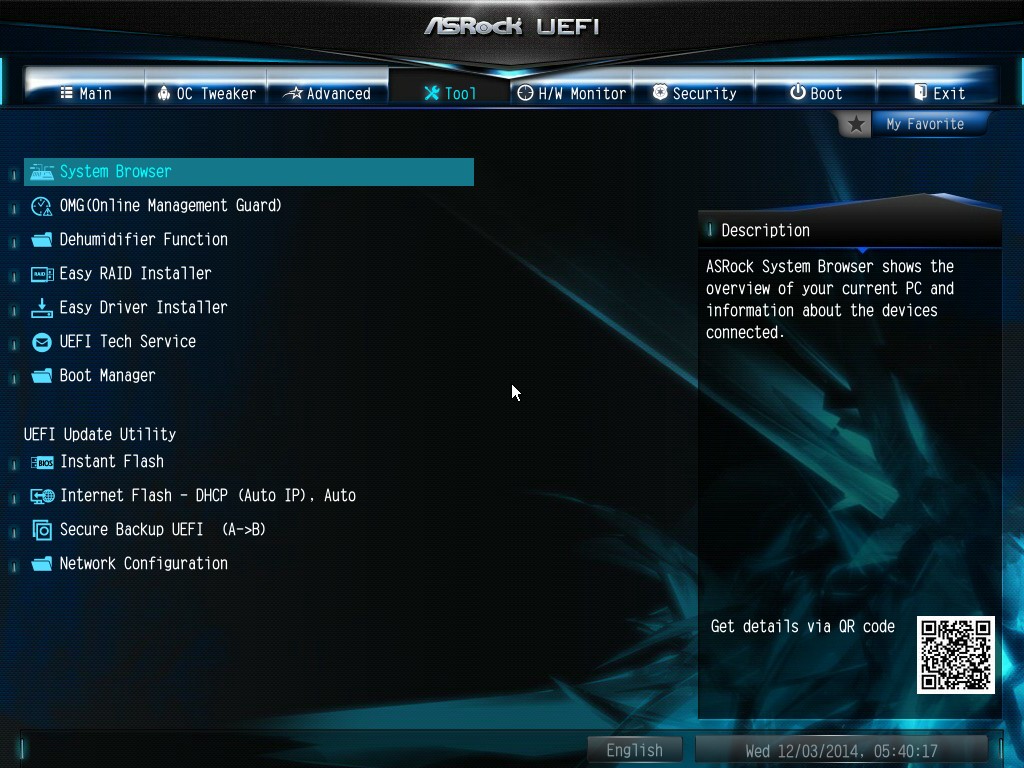
The Tools menu is typically where ASRock tries out its more unusual ideas, although we do not get anything new for X99 that we have not seen on Z97 already. The System Browser shows the different elements of the motherboard and what is detected:

The Online Management Guard (OMG) allows the user to enable or disable the network ports at various times of the day, as determined by the system time:
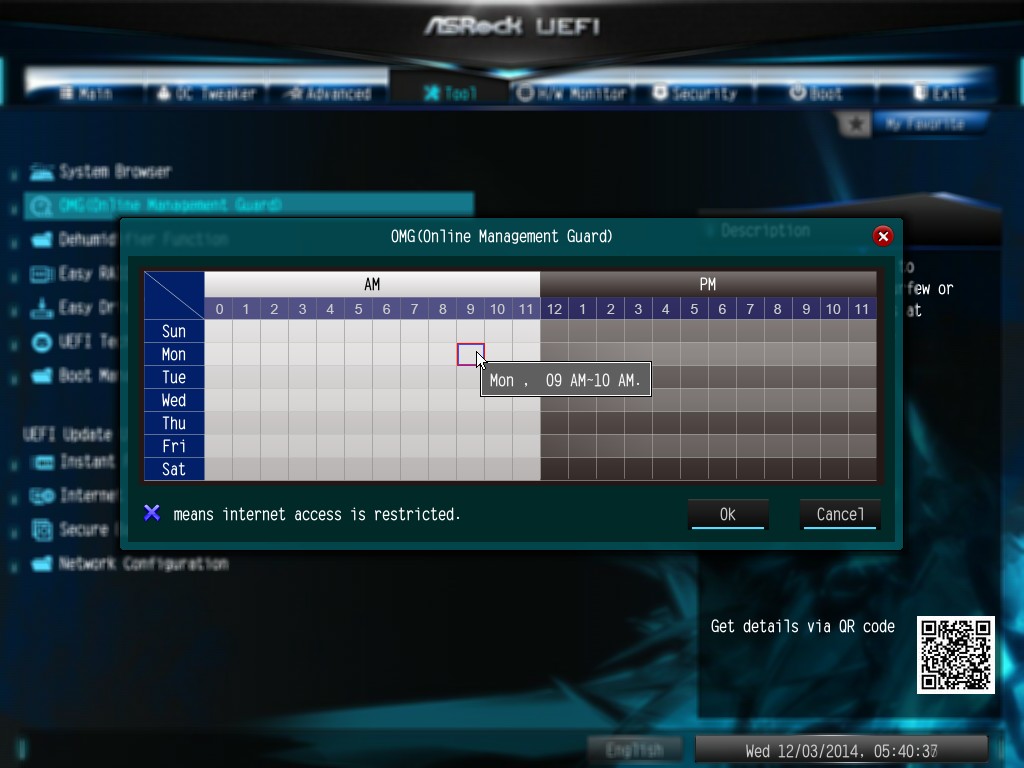
(It is amusing that this feature is aimed more at controlling when a child is allowed online, but X99 is not exactly a system configuration used as secondary machines.)
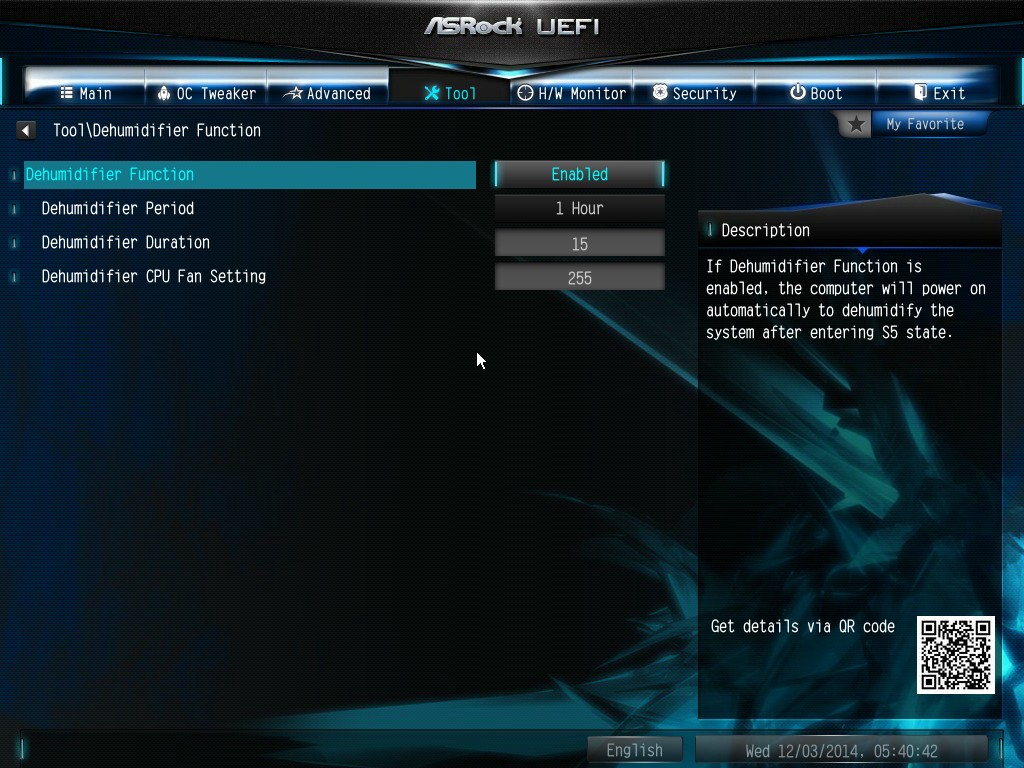
The Dehumidifier function now gets its own sub menu, allowing fans to spin for a fixed time after the machine is in S5:
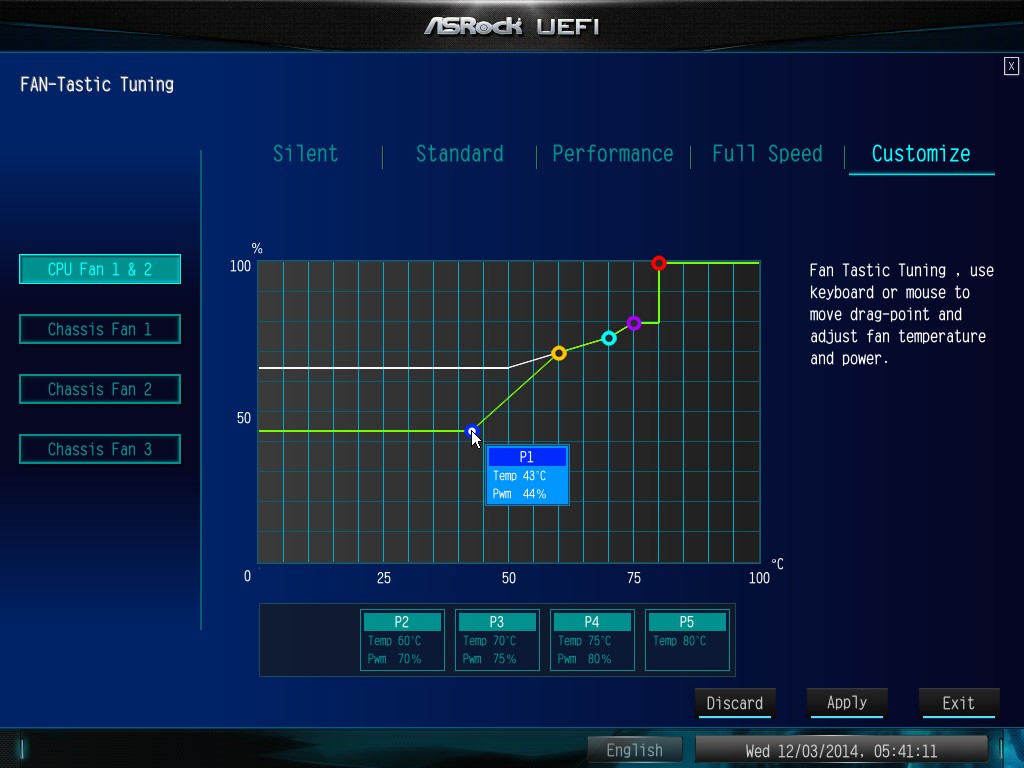
The H/W Monitor tab is where the temperatures, fan speeds and voltage monitoring tools are all kept, and we have seen an effort by the other manufacturers to improve the fan control situation. ASRock now joins them with the FAN-Tastic tuning option, moving into a more interactive type of scenario. This extends the multi-point gradient options into something more clickable, similar to the ASUS implementation. For example, a user can put a fan into one of five modes or customize the profile:
Rather than using the interface, users can do it the older way:
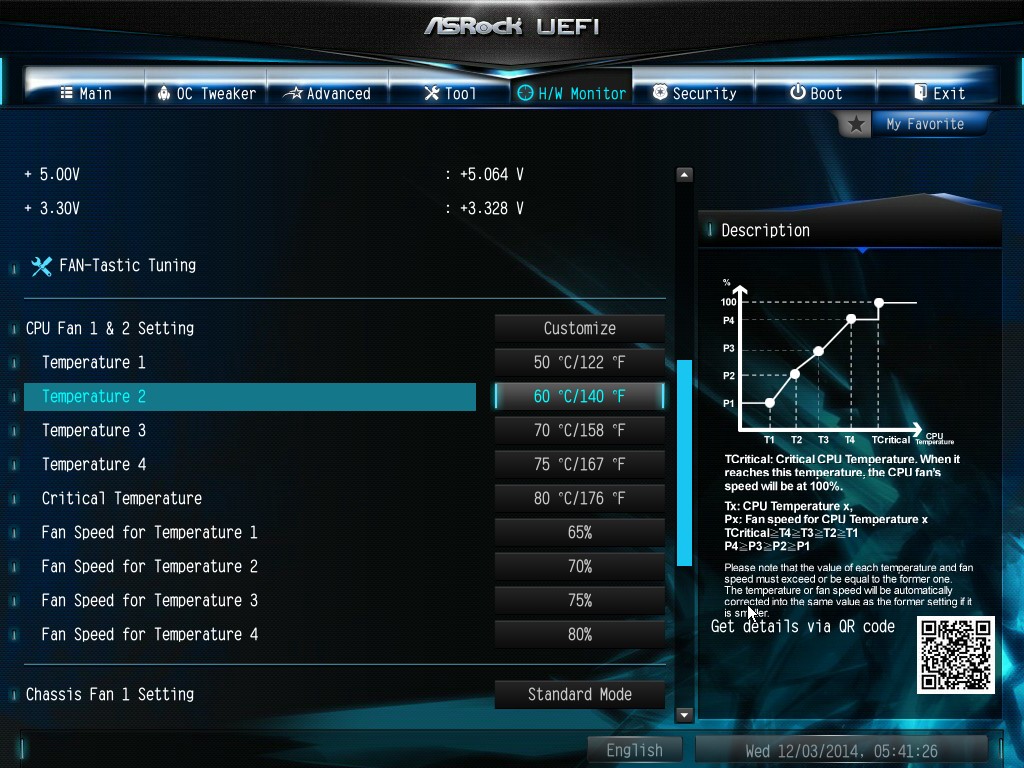
There is also an option to select which temperature sensor is being read from to make these adjustments.
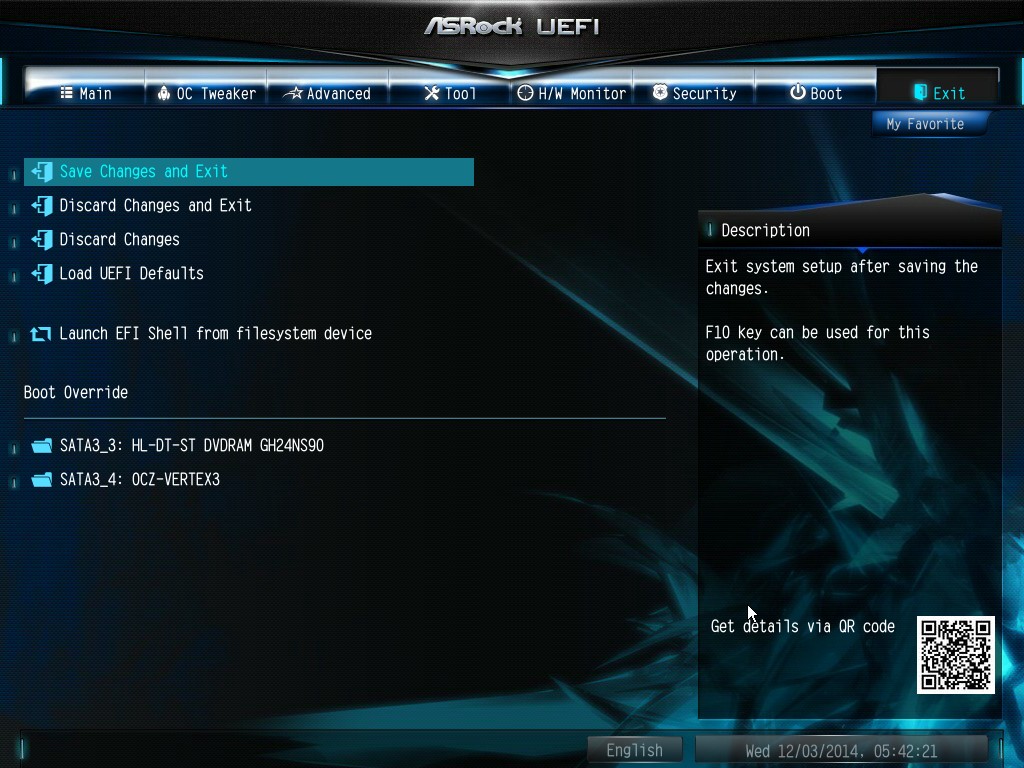
The rest of the BIOS deals with security, boot order and fast boot options. In the Save and Exit menu we do get options for Boot Override:


45 Comments
View All Comments
DanNeely - Monday, December 15, 2014 - link
"Users should also note that only one [motherboard molex plug] needs to be connected when 3+ PCIe devices are used to help boost power. I quizzed them on SATA power connectors instead, or a 6-pin PCIe, however the response was not enthusiastic."I can understand them not liking the idea of using a PCIe cable if they don't need more than a single 12v pin for extra power because a lot of users wouldn't have an extra available to use without going for a kludgy molex-pcie adapter; but what's the problem with using a sata power plug?
themeinme75 - Tuesday, December 16, 2014 - link
I find this interesting the molex spec is 60 watts on the 12v line, even though you probably get 75+ safely and sata would have 54 watts for 12v line. I think for a MB that cost 500+ with user that plan multiple GPU I think you can get a power supply with plenty of connections.themeinme75 - Tuesday, December 16, 2014 - link
http://www.moddiy.com/pages/Power-Supply-Connector...wolrah - Tuesday, December 16, 2014 - link
My guess is it's because the Molex connector is significantly more durable and any modern system is sure to have one available.A home server would be a pretty logical role for this board, so you might have already devoted all 12 of the SATA power connectors most power supplies ship with to running hard drives. Likewise as you note a workstation could easily use up their PCIe power connections with GPUs.
That leaves the Molex as the one of the three regularly available power connections which can be most expected to be available.
Dakosta Le'Marko - Thursday, December 18, 2014 - link
Stunning! I've started averaging 85 dollars/hourly since i started working online half a year ago... What i do is to sit at home several hours each day and do simple jobs i get from this company that i found over the internet... I am very happy to share this with you... It's an awesome side job to have http://orkan201.tkddriver - Monday, December 15, 2014 - link
Price : US (Newegg) ->Search Terms: "x99 ws-e 10g"
We have found 0 items that match "x99 ws-e 10g".
Ian Cutress - Monday, December 15, 2014 - link
While the product is officially announced, it doesn't seem to have filtered through yet, hence we don't know the pricing. When it gets to Newegg, hopefully that link will show it.ShieTar - Monday, December 15, 2014 - link
There are a few offers in Europe already, for >700€ (>900$):http://preview.tinyurl.com/mduqtgu
akula2 - Thursday, December 18, 2014 - link
Thanks for mentioning the price. I'll settle for Asus X99-E WS boards.Pcgeek21 - Monday, December 15, 2014 - link
Were jumbo frames used for the 10GBASE-T testing? They would need to be enabled both inside the VMs and in ESXi's virtual switches (if they were used). My recollection is that jumbo frames were created to deal with the problems you encountered with CPU usage on 10Gb links.