ASUS Eee Pad Transformer Prime Teardown
by Anand Lal Shimpi on January 4, 2012 4:54 AM EST- Posted in
- Tablets
- Eee Pad
- Asus
- Mobile
- Transformer Prime
In researching for my piece on the Transformer Prime's GPS issue I needed to know the location of the GPS antenna inside the Transformer Prime. Given the limited supply of Transformer Primes at this point, it's not too surprising that no one has done a proper teardown of the tablet. I grew frustrated of trying to figure out what was going on in the leaked FCC photos of the TF Prime so I decided to dissect mine.
If you hold it in a landscape orientation with the camera at the top, the Prime is held together by a bunch of plastic snaps across the top/sides and adhesive along the bottom. The easiest way to get it open is to separate the display from the aluminum chassis using a plastic opening tool along the top and sides. You'll need a heat gun to warm up the glue to get the bottom to pry apart. Proceed at your own risk, while I was able to put the Prime back together after all of this there's a high risk of damaging your beauty.
There are two ribbon cables (three connectors) that have to be disconnected before you can separate the Prime into its two halves. The display half tells an interesting story:
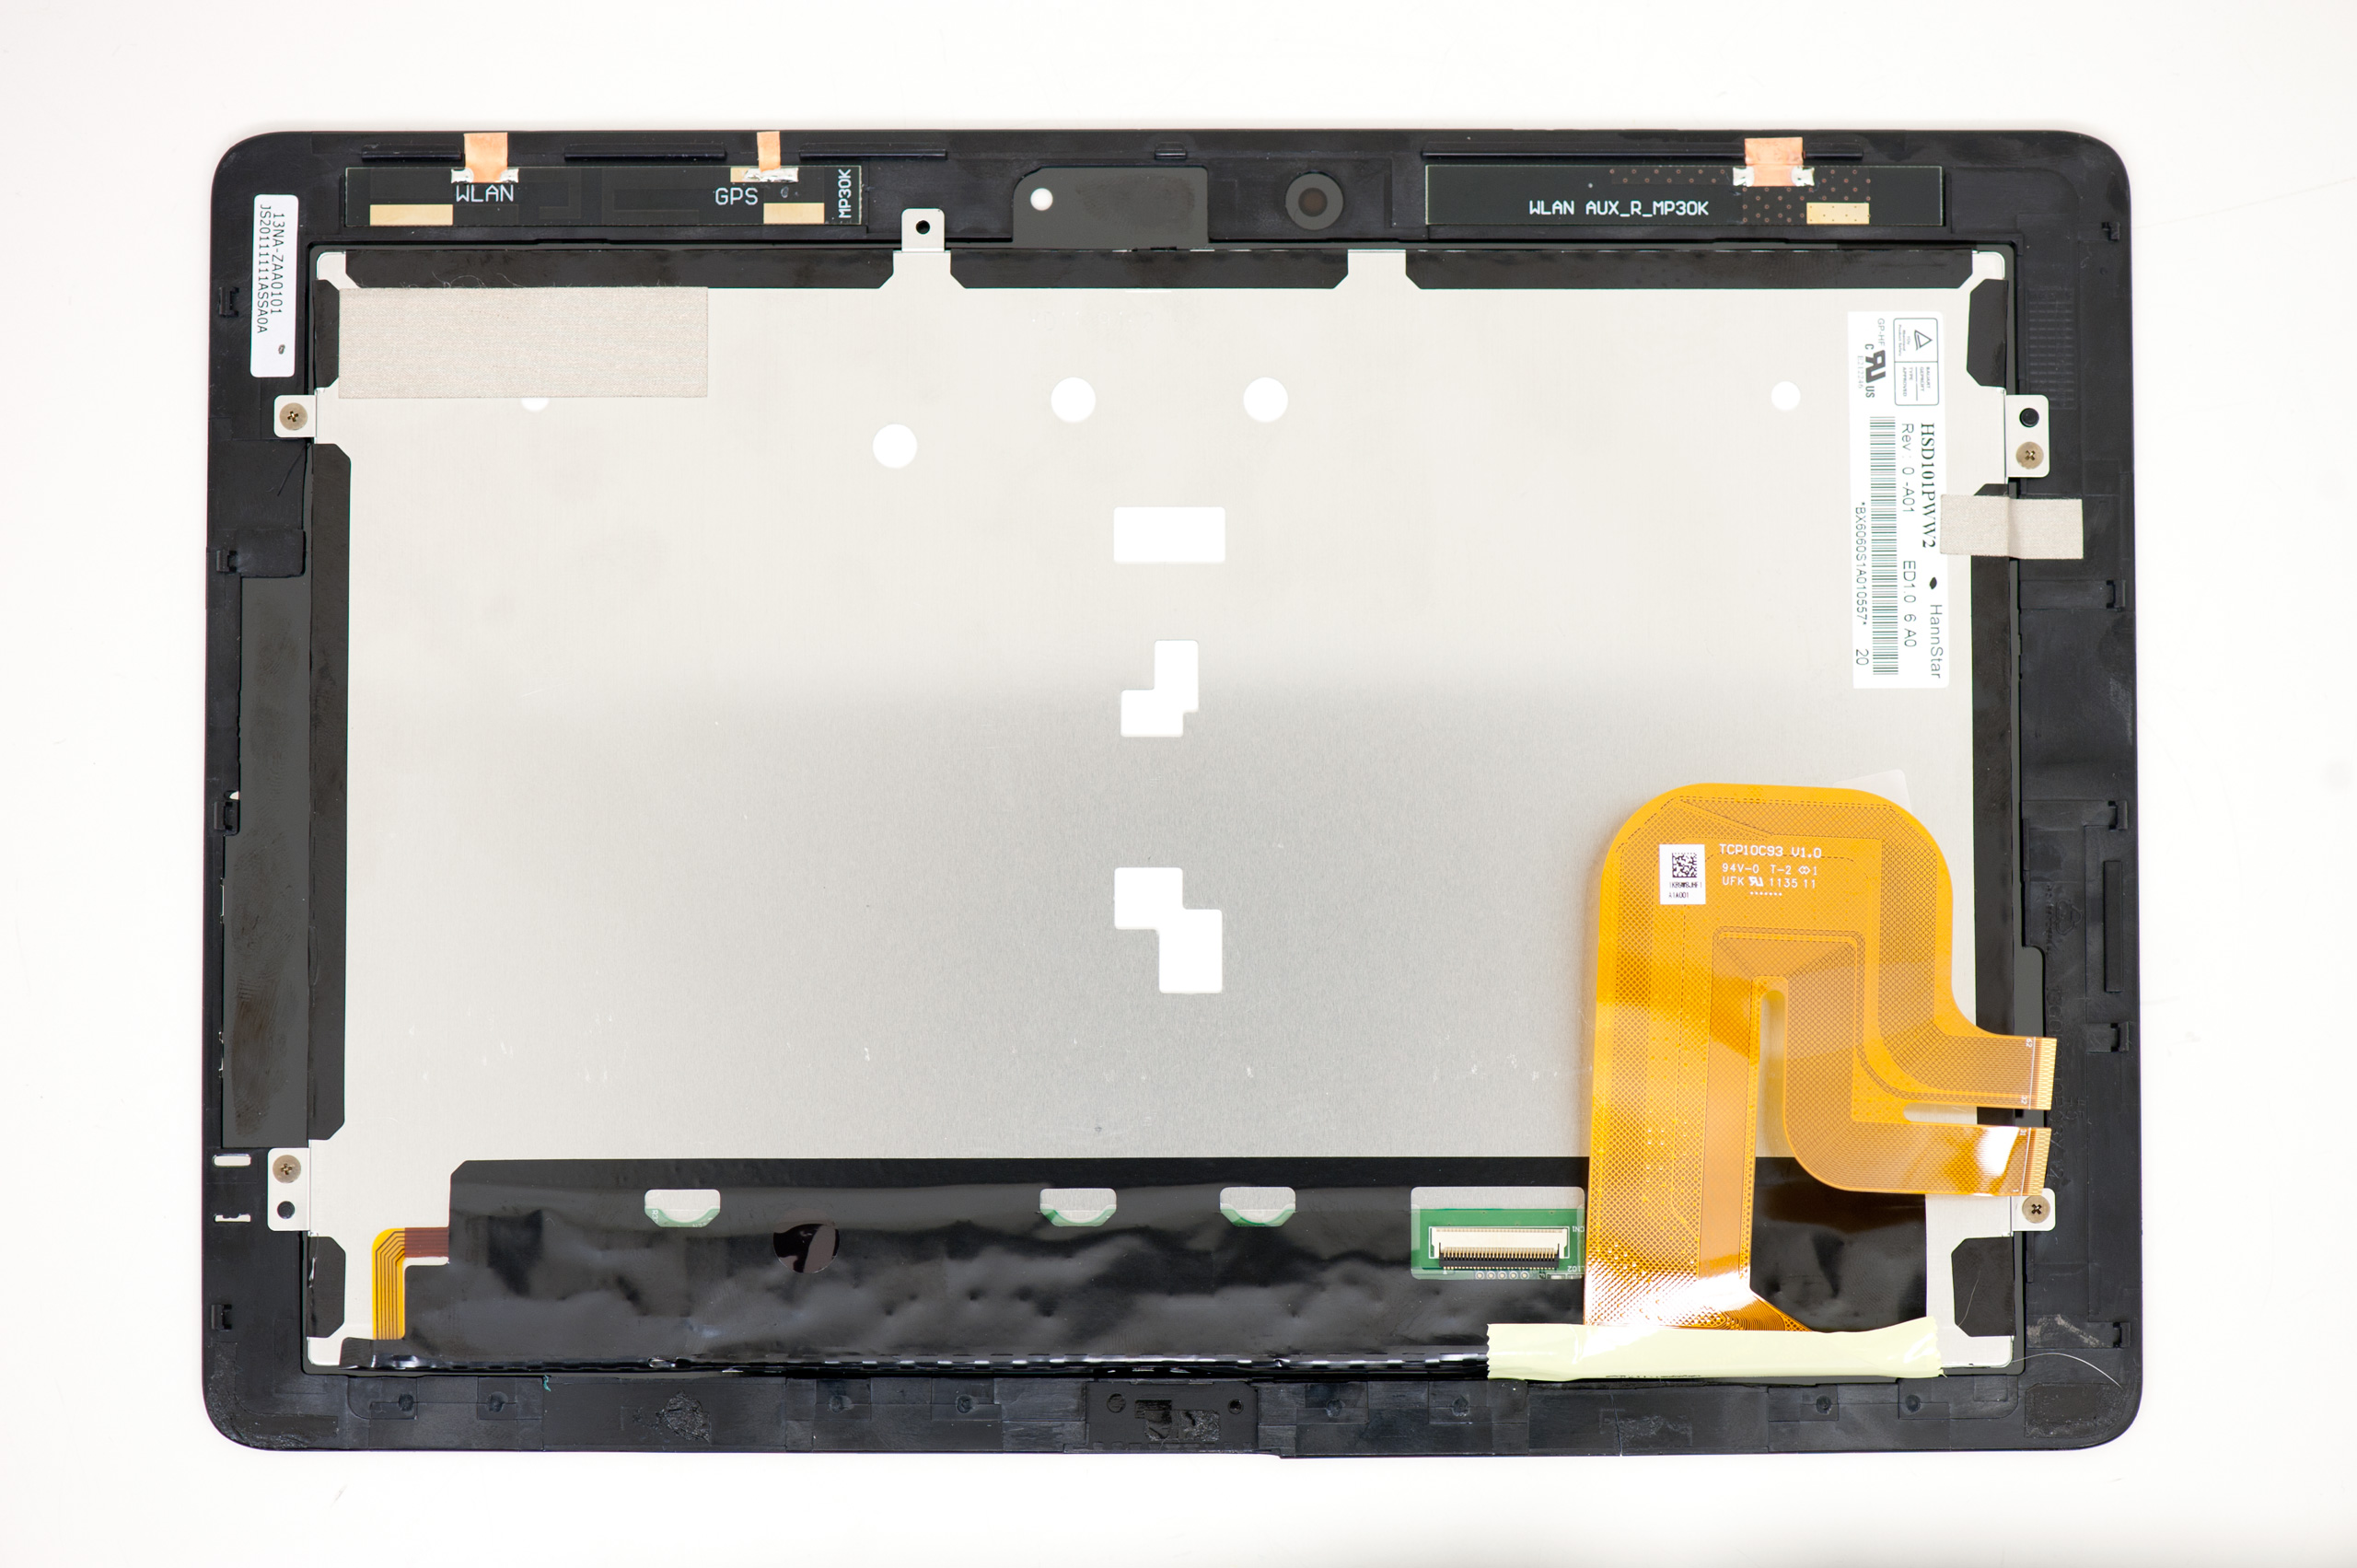
There are contacts for the two WiFi antennas as well as for the GPS antenna on the display side of the Prime. Flipping back over to the motherboard side you'll see how the signals cross the gap:
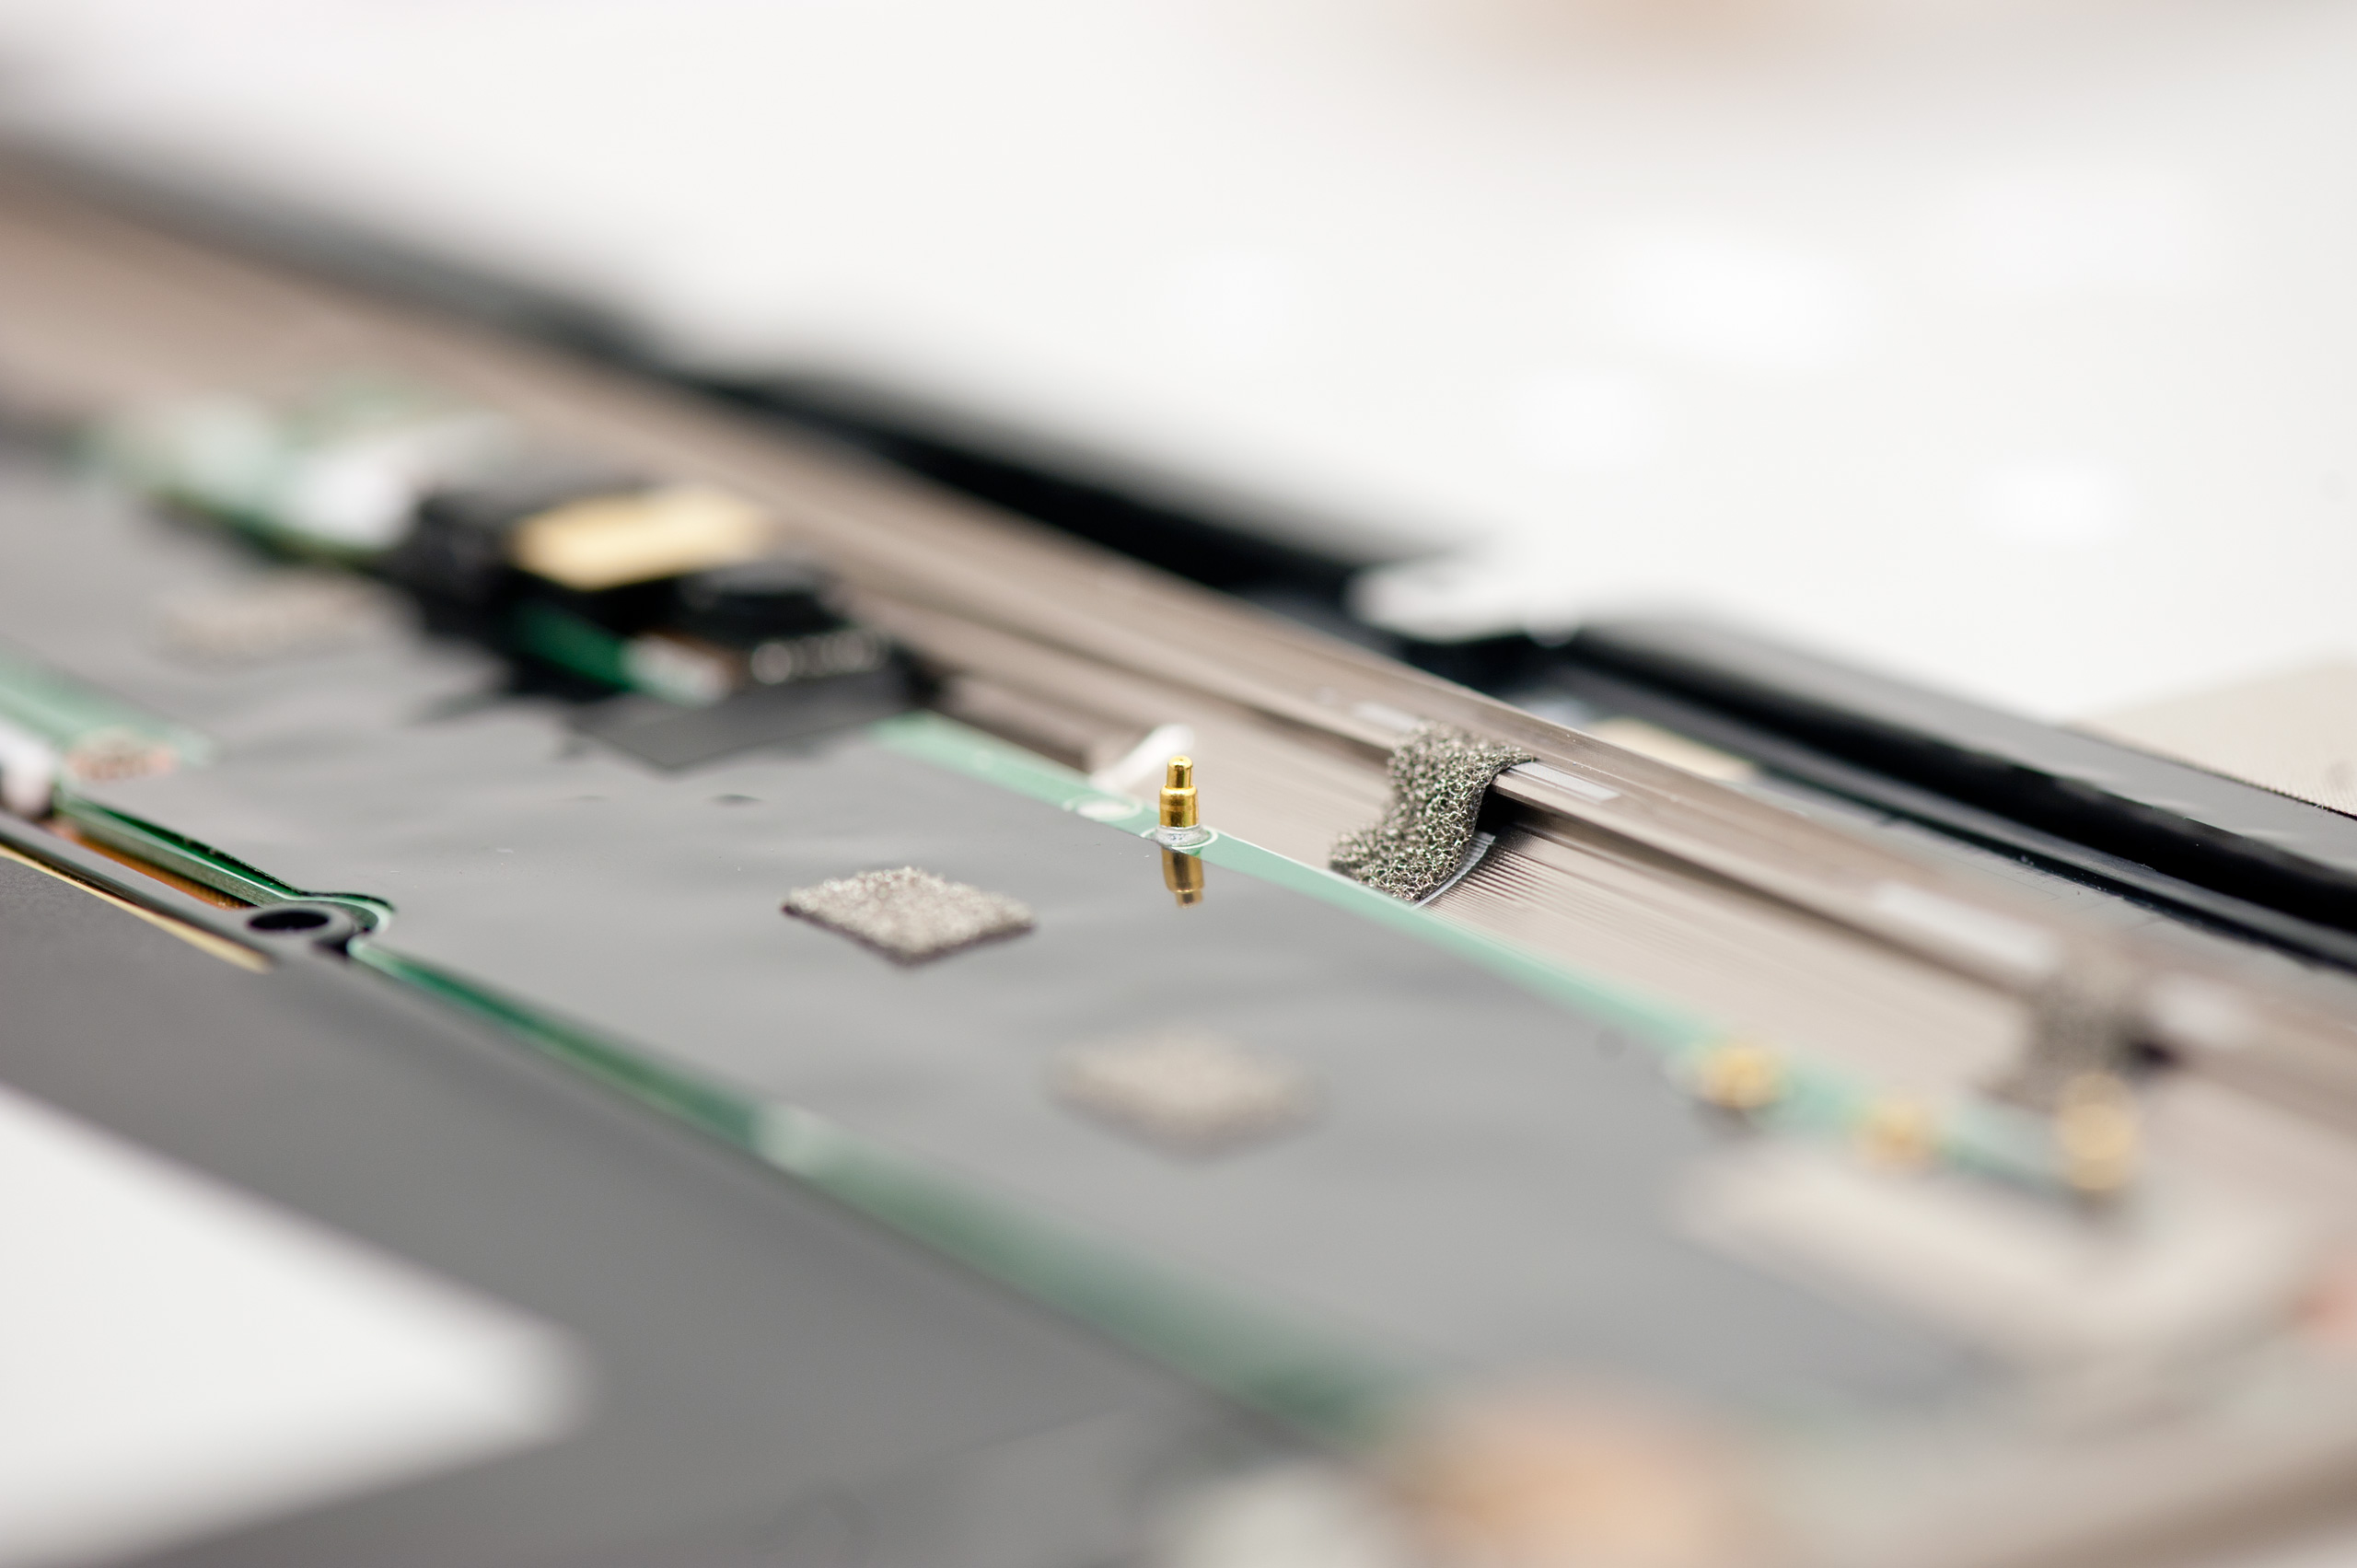
Little pogopins make the connection between the traces/pigtails on the PCB side of the Prime to the antennas on the display side. There are three pogopins and three contact points. This is arguably better for reception than burying antenna pigtails between the PCB and the aluminum chassis.
The labels on the antenna PCBs give us the first indication that there's WiFi antenna diversity in the Transformer Prime:

The Prime's long, slender motherboard is covered by black tape populated with a few small, conductive pads. These pads connect ground points on the Prime's motherboard to the metal backing of the display:
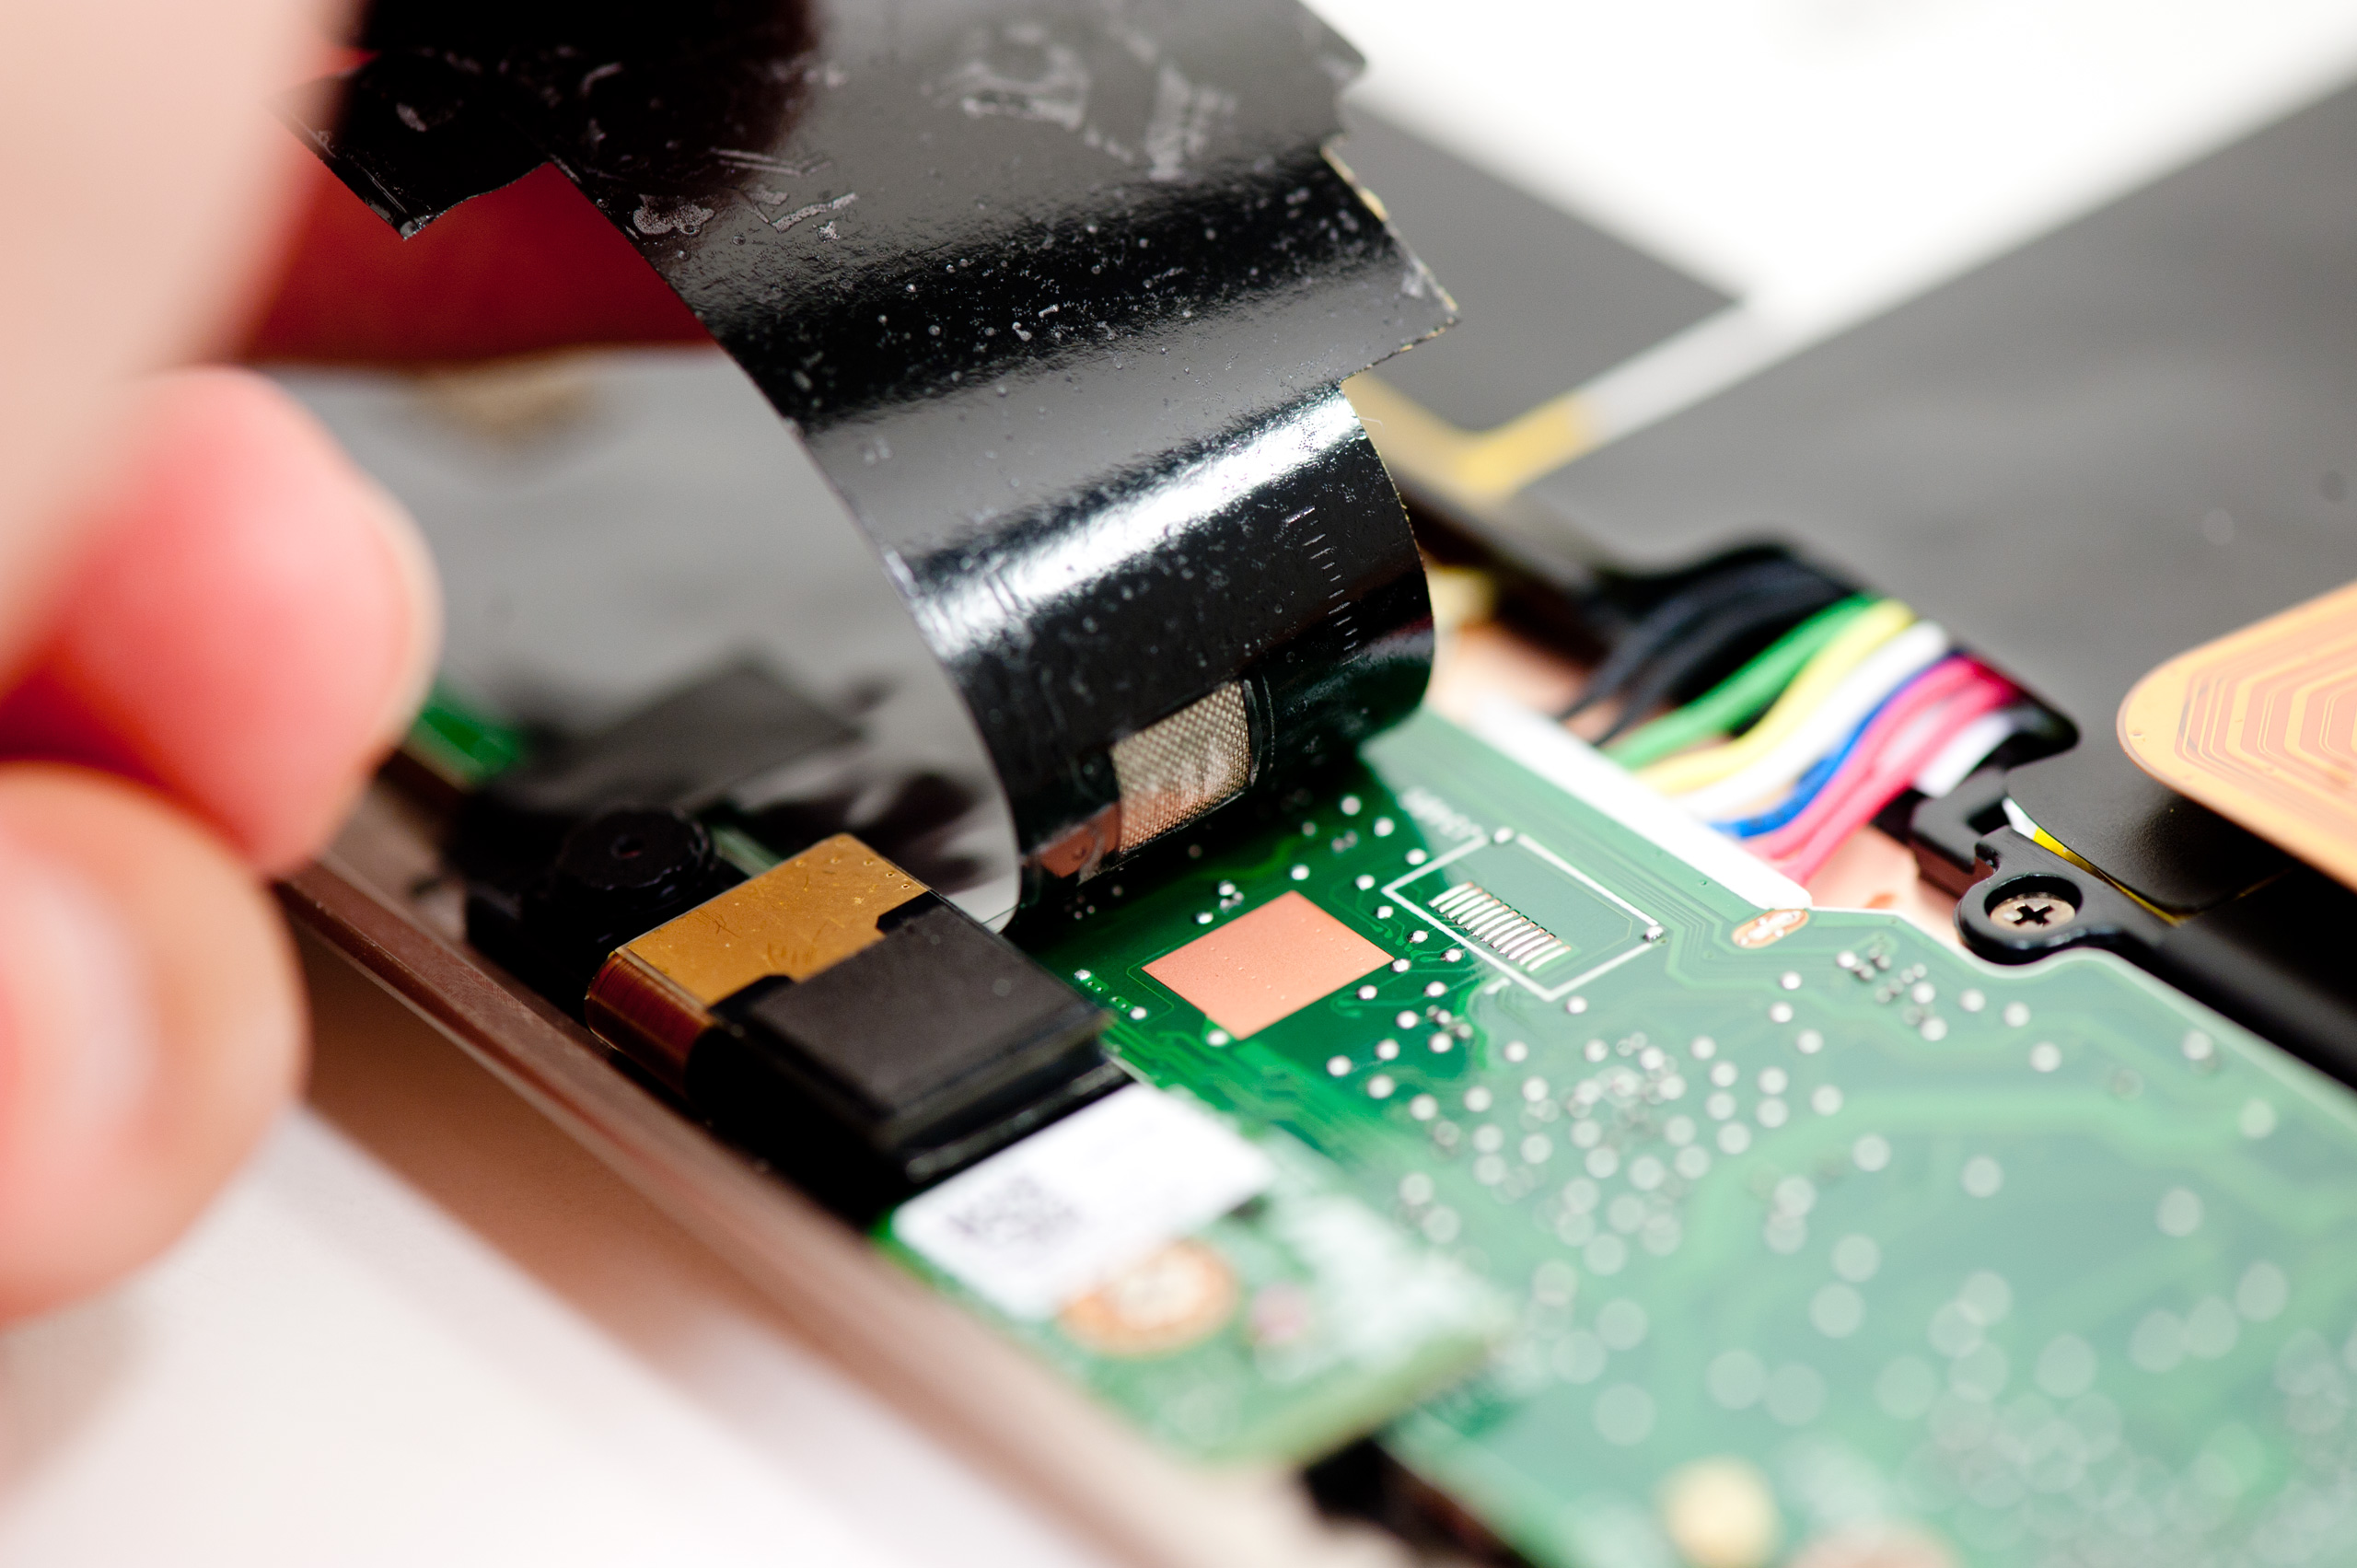
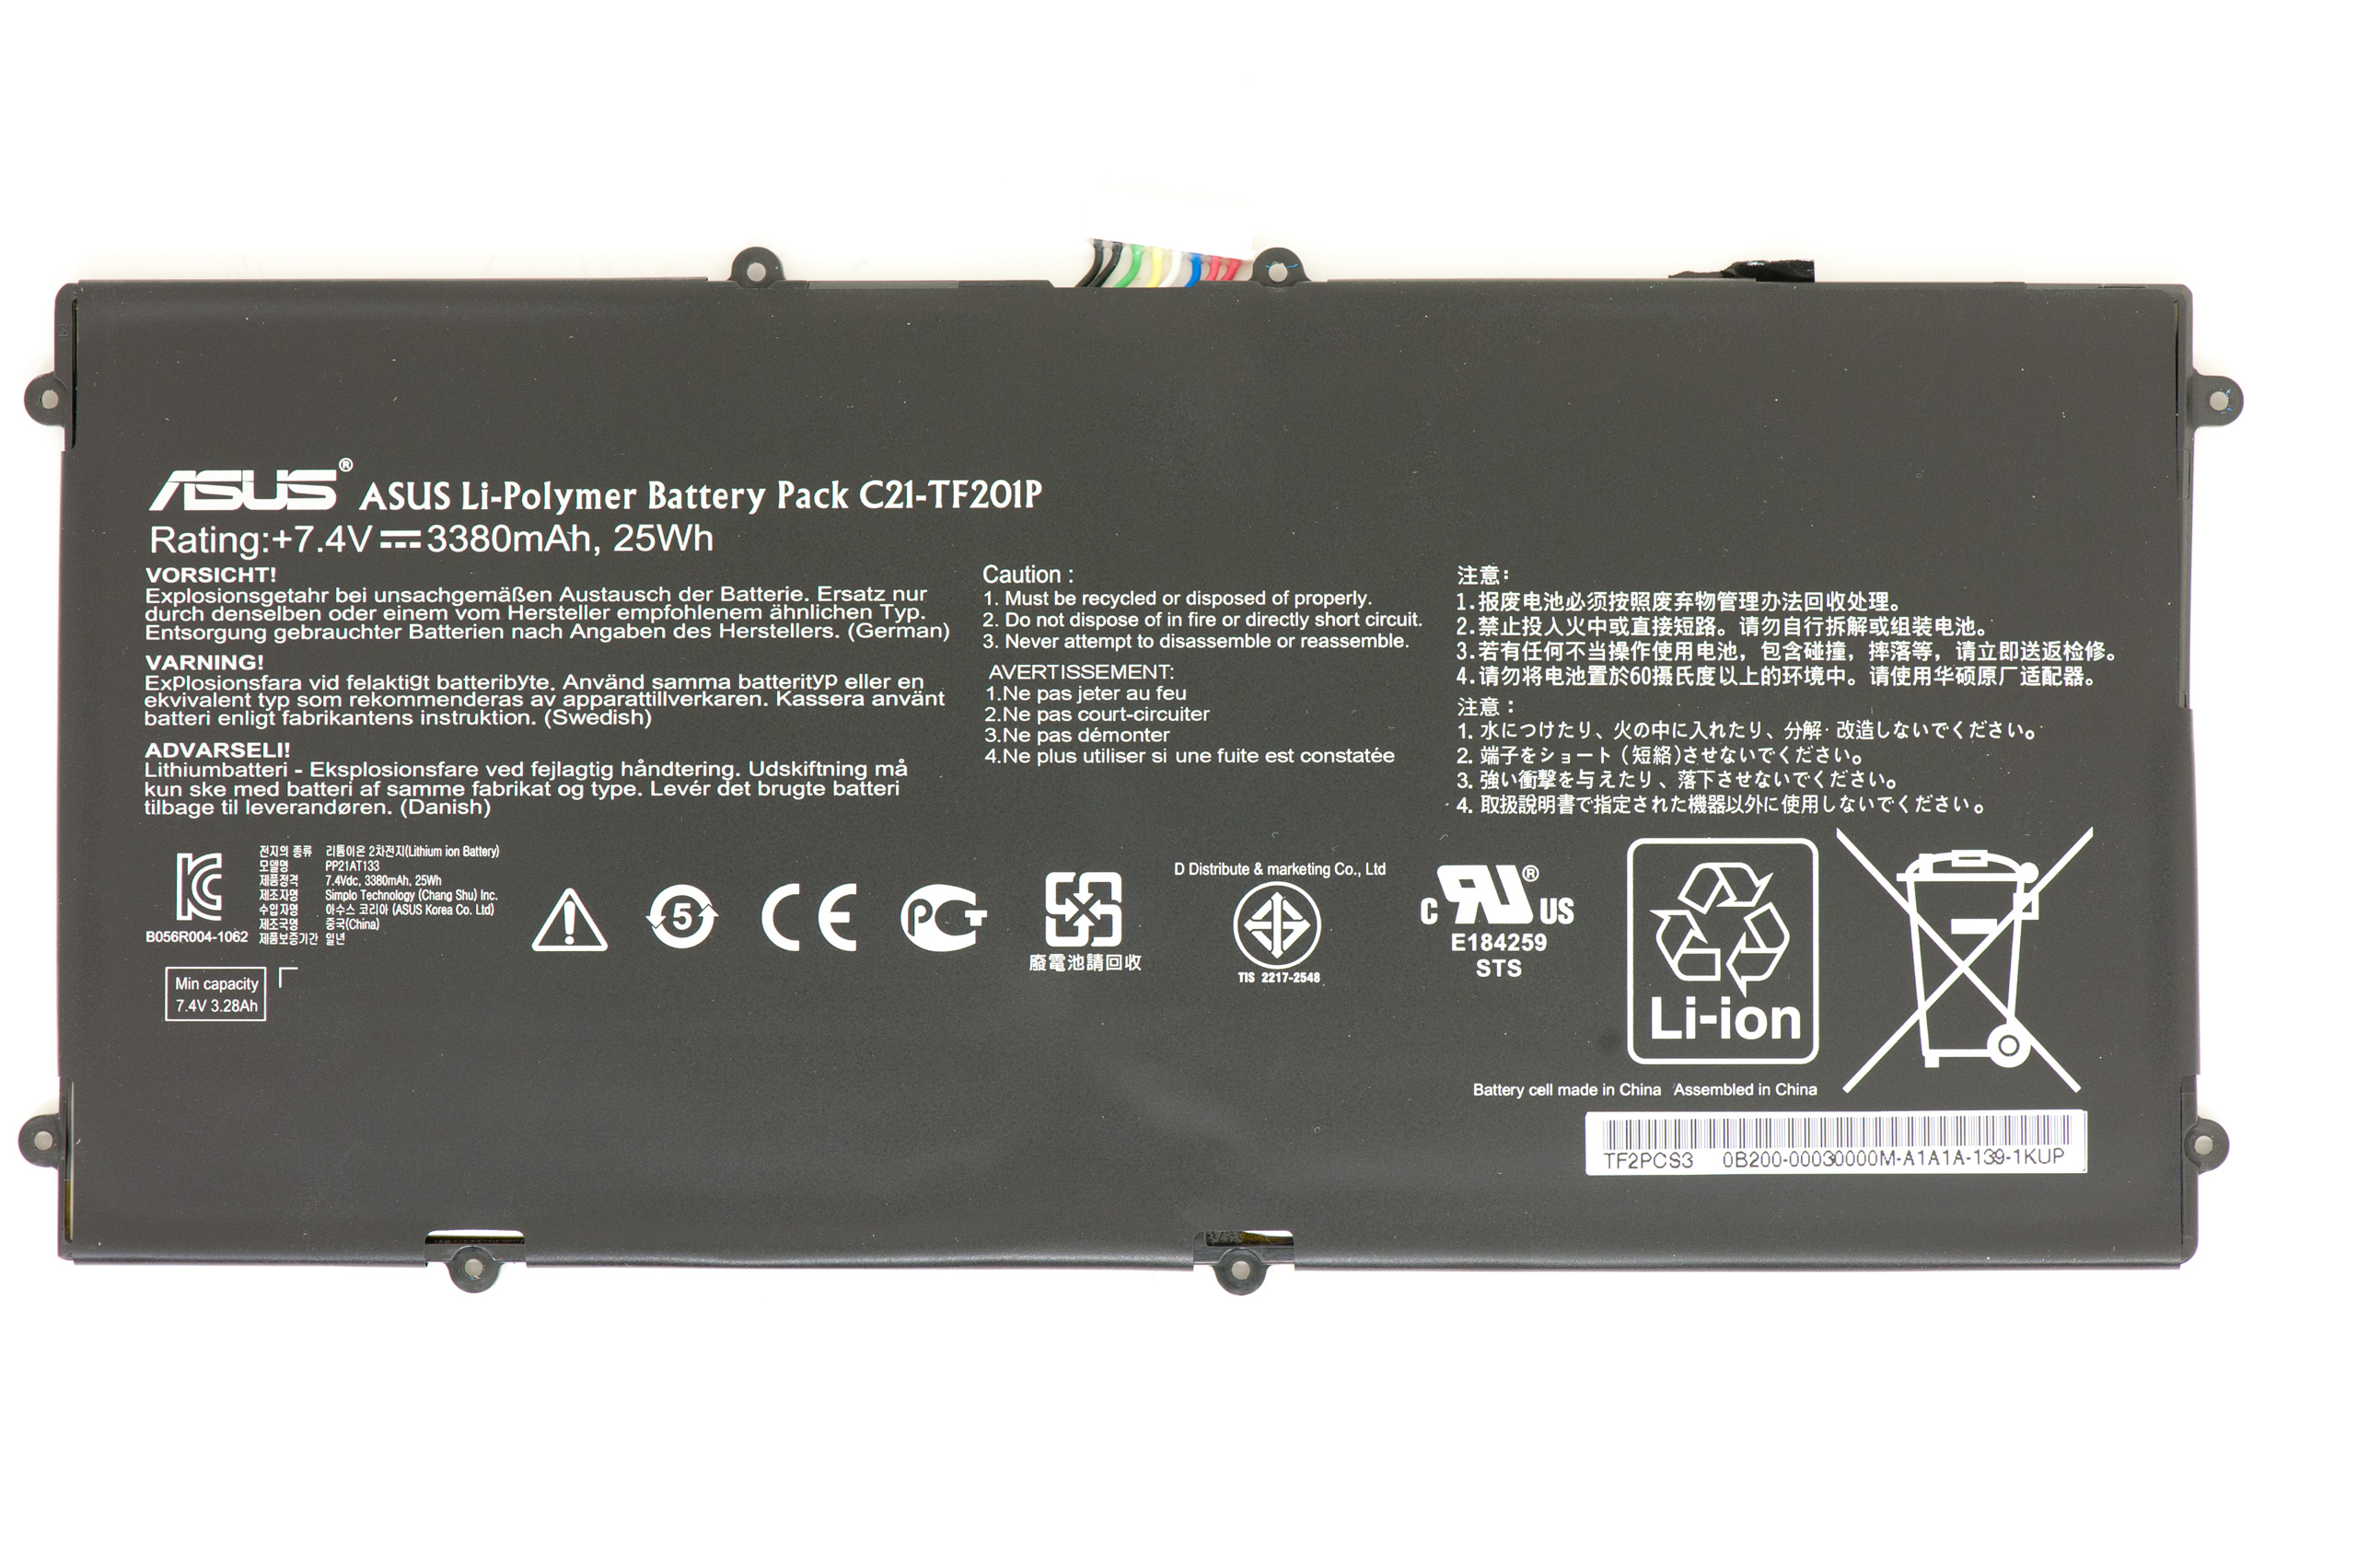
With the tape removed we have access to the motherboard, although its easier to remove if you first pull out the battery:
The component-side of the motherboard is also covered by black tape however this time there's actually a thin but fairly rigid layer of metal enclosed by the tape. The metal is used as a heatsink (primarily for the Tegra 3 SoC) and is exposed in a couple of areas along the board:
Four ARM Cortex A9 cores running at up to 1.3GHz is enough to require some heat dissipation, although thankfully we don't have to worry about cramming fans into these tablets.
Here's the full board:
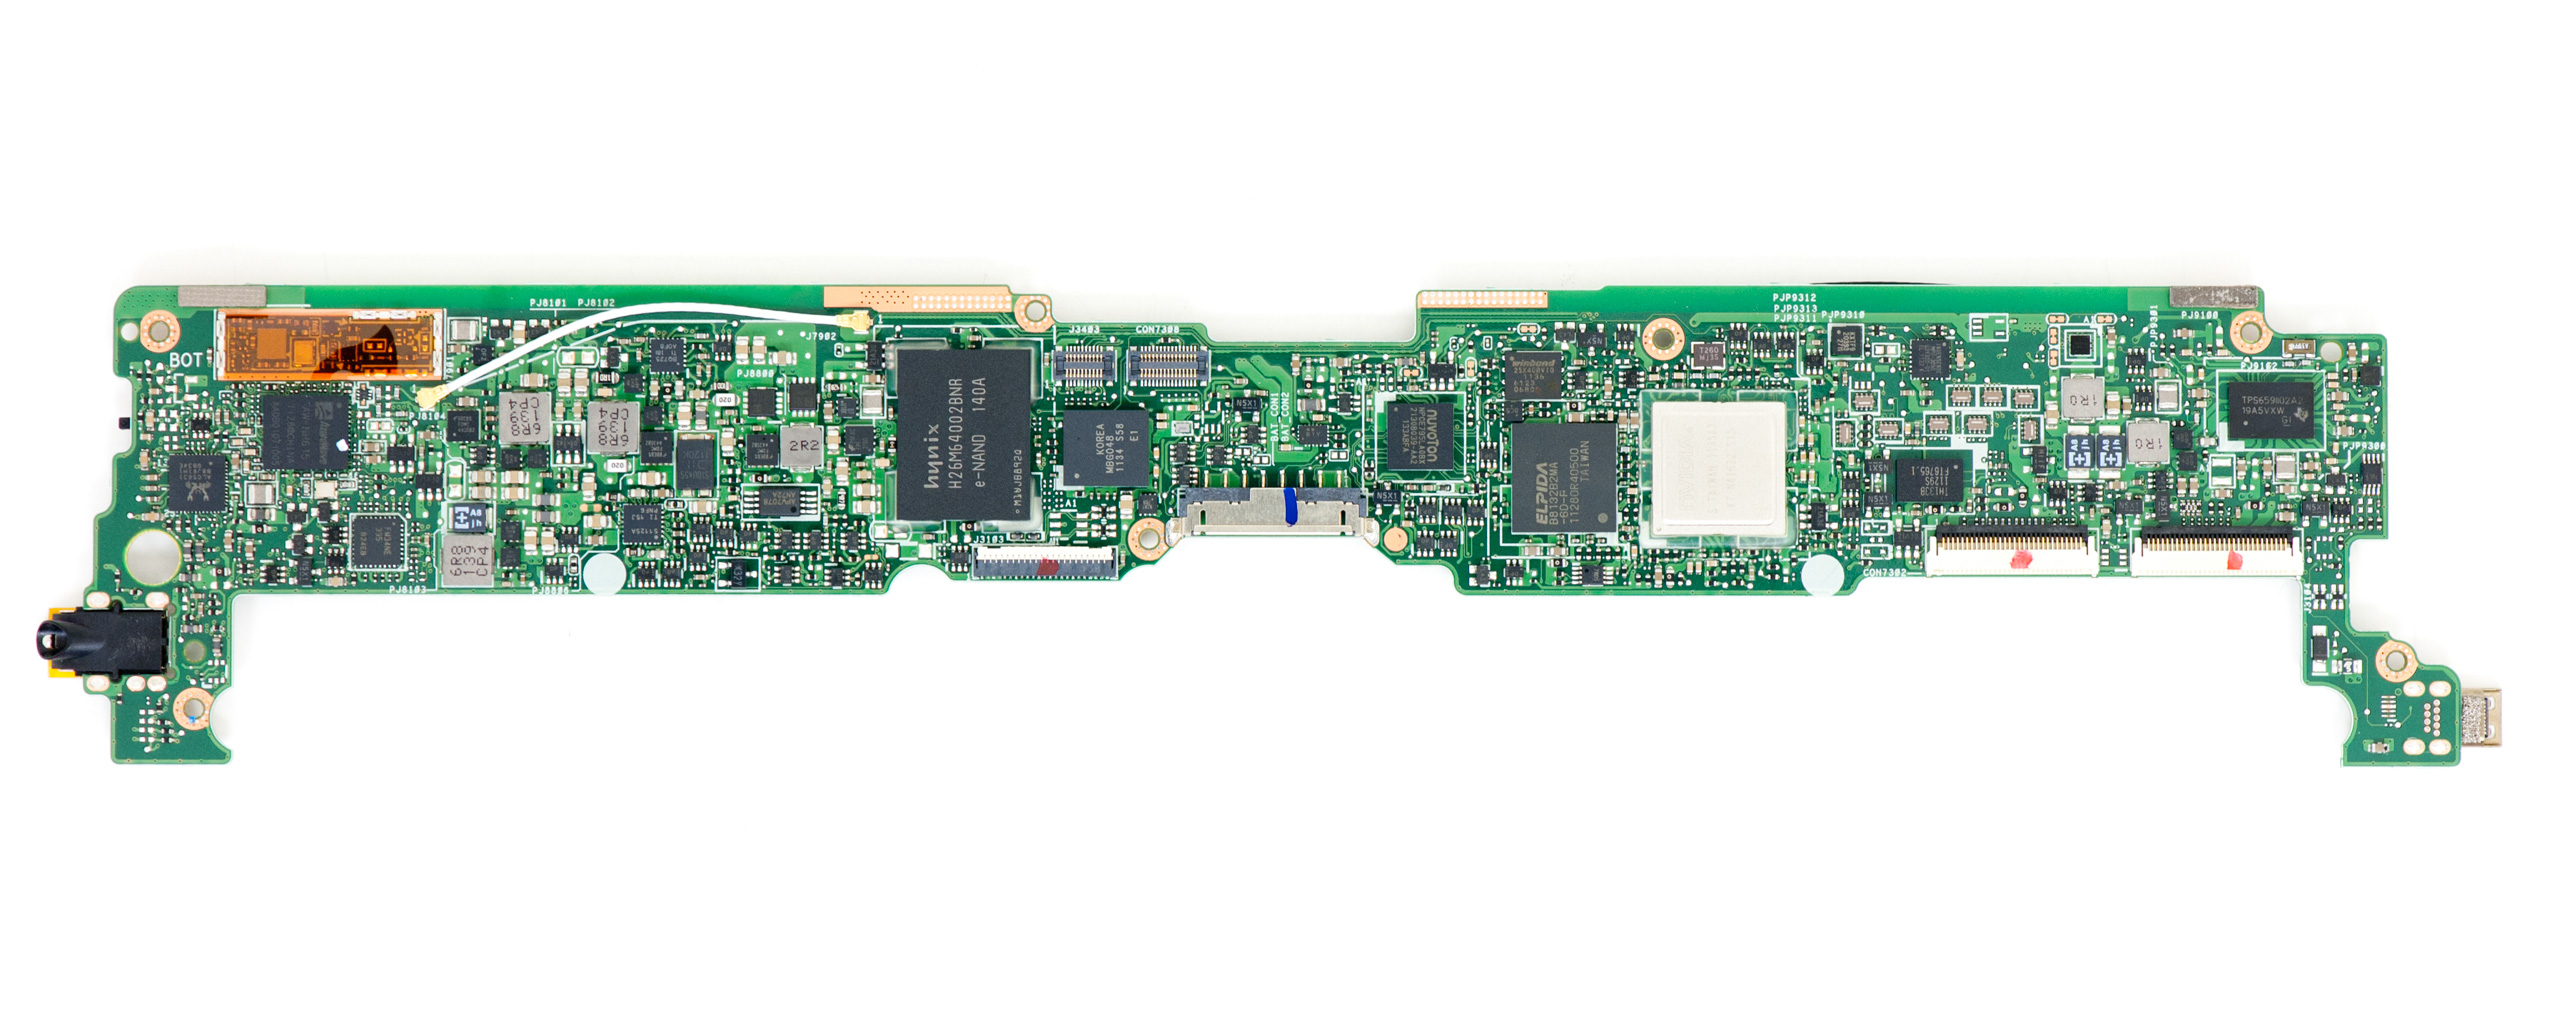
If you flip through our teardown gallery you'll notice a pair of antenna pigtails (one seen above) on the Prime's motherboard. There's continuity between these pigtails. We suspect they are used to bring the second WiFi antenna chain to the other side of the motherboard (the Azurewave WiFi controller is on the leftmost side of the board, near the first WiFi antenna).
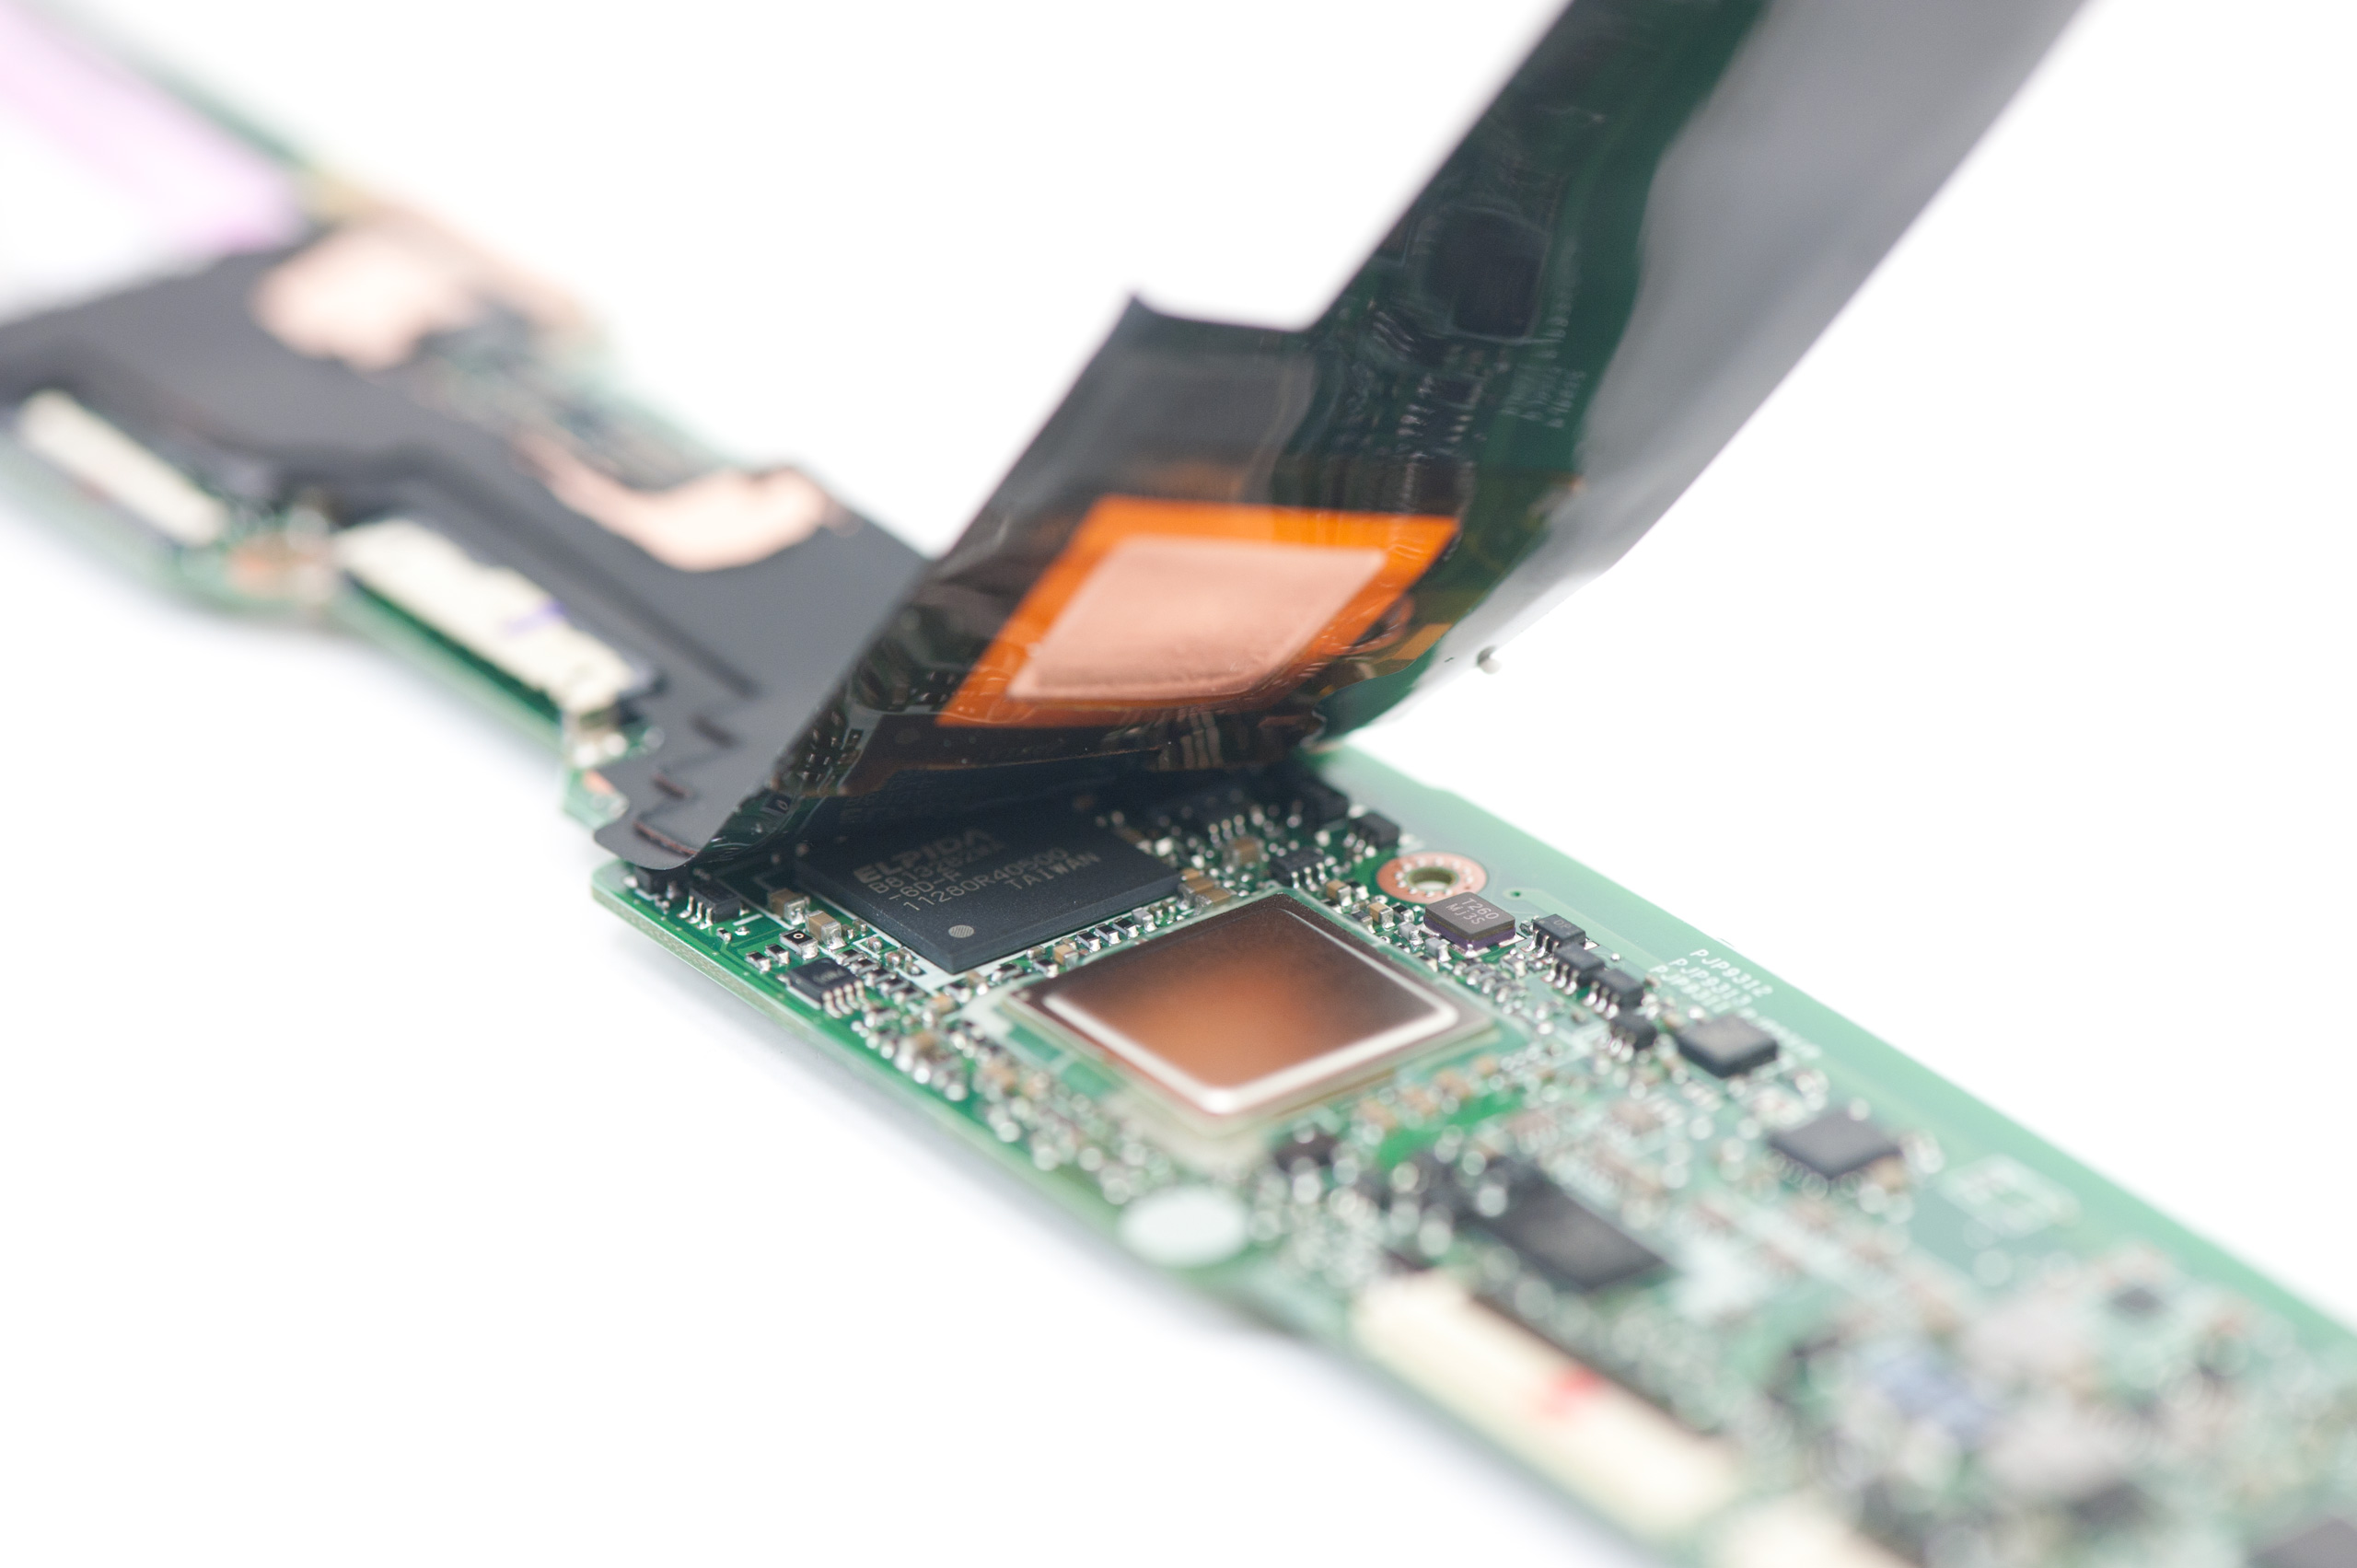
There aren't many surprises inside the Transformer Prime. There's a 32GB Hynix e-NAND (eMMC controller + MLC NAND in a single package) device on-board as well as a single 1GB Elpida LPDDR2 DRAM. It's unclear to me what the specified operating frequency is of this DRAM since Elpida hasn't updated their public DRAM datasheets in years.
Overall the design and layout are pretty neat. It's insane to see the level of integration on these tablet PCBs. I still remember the days of reviewing AT-sized motherboards before we got on-board audio codecs. I'm particularly interested to see what happens as traditional PC architectures start showcasing similar levels of integration. Haswell will already be made available in a single chip SoC solution. While it won't be cool enough to fit into a fanless tablet, the line between notebook and tablet will be further blurred as a result.
If you are curious to see more shots of the inside of ASUS' Eee Pad Transformer Prime, check out our gallery below:


14 Comments
View All Comments
zappb - Thursday, January 5, 2012 - link
the Asus Transformer I had, was knocked to the ground on a number of occasions by my 4 and 2 year old and just broke down.I couldn't return it because it was my own fault.
So I did a tear down, hoping to find some sort of memory connector to see if I could recover some of the photos, Once I had it opened I noticed the battery started leaking (user error again no doubt), and the glass (which was broken at this stage (again user error) hehe) was splintering into a million pieces.
Be warned everyone, there are really tricky to open and tinker with, even if you've been building computers for 10 years, For health and safety reasons I had to get rid of it all, and realised it would have been impossible to recover the photos from the nand memory (because i couldn't even locate it on the motherboard of the transformer).
Anand is being too modest about what it takes to open these things, you are very skilled Anand and this is a good walkthrough on how to do a tear down properly.
shopscounty - Monday, January 9, 2012 - link
Shopping for all your favorite brands of <a href="http://www.shopscounty.com">tablets and laptops - ASUS Transformer</a>shopscounty - Monday, January 9, 2012 - link
Buy from our selection of tables . Find your favorite ASUS Transformer http://www.shopscounty.comjohnnythegeek - Saturday, January 14, 2012 - link
Hello Mr Shimpi. I would like to know how you were able to open the Transformer Prime. I would like to do the same. There appears to be 2 rubber pieces and when I removed them I don't see any way in. Do I just heat this up with a heat gun and pry it open ifix it style? I would appreciate some help on this. Thanks.