Kaby Lake Motherboards at $140: MSI Z270 SLI Plus vs. ASRock Z270 Killer SLI
by E. Fylladitakis on May 1, 2017 10:30 AM EST- Posted in
- Motherboards
- Intel
- MSI
- ASRock
- SLI
- Kaby Lake
- Z270
- Z270 SLI PLUS
- Z270 Killer SLI
BIOS
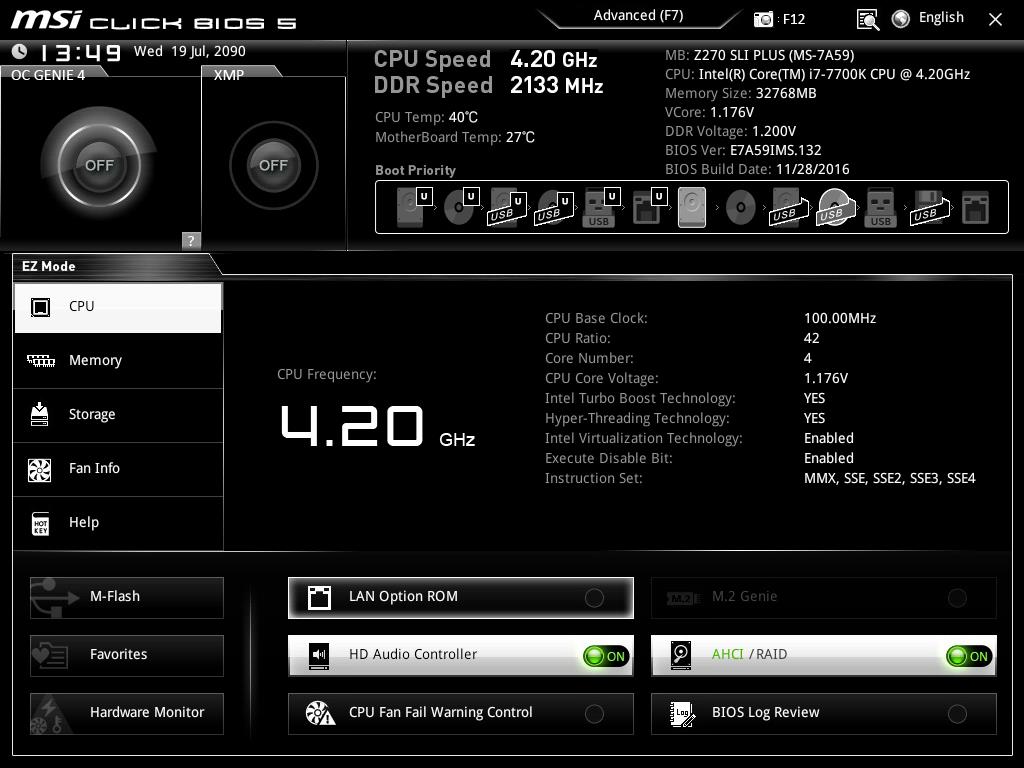
The MSI Z270 SLI Plus has a user-friendly graphical BIOS that MSI calls the “Click BIOS 5”. Its default “EZ Mode” reduces it down to a single screen that is offering only the most basic options and system monitoring. There are two large buttons for the automated “Genie” overclocking mode and for the enabling of the RAM XMP profiles, plus a few buttons at the bottom of the screen that can be used to switch on/off the LAN Option ROM, the HD Audio Codec, the M.2 Genie (RAID), the SATA ports between AHCI and RAID, and the CPU fan warning. The sixth button pops up a log screen that displays all of the changes that have been performed during this and previous BIOS sessions. The hardware monitor button pops up a screen with all of the installed fans, the primary temperatures and voltages. From here the user can also tweak the performance of the connected fans to his/her liking.
The “Advanced” mode can be used to reveal the entirety of the BIOS options. At first, the screen with the six large buttons looks very uncomplicated, but there are many settings that are mostly hidden into submenus.
The “Settings” submenu includes just five options. One of them is the simple “Save & Exit” option and the “System Status” option is almost entirely informative, with the system’s time and date being the only adjustable options here. The “Boot” and “Security” submenus are straightforward as well, with few options in each. However, the “Advanced” option brings up a whole list of other submenus, each for the control of individual features found on the motherboard. Some menus have only one or two sub-options, such as the “ACPI settings” menu that only offers the option to choose whether you would like the LED to be blinking or not. We can also notice the “Secure Erase+” option here, which is a feature we do not usually see in a BIOS. This practically is a “low level format” tool for SSDs that will effectively destroy all data of an attached SSD.

The OC button brings up all of the overclocking-related options. This includes frequency controls, timing controls, voltage settings, informative screens and CPU features options. Even on its “Simple” default setting, the number of options can be overwhelming for amateurs. The highly experienced and advanced user has to switch to the “Expert” mode for all of the options to become available. In a single long menu, we have a long list with the main CPU, DRAM, Voltage and other settings. Advanced options are accessible via submenus (the “>” sign denotes that the option will bring up a submenu).
The maximum system memory multiplier is 41.33 (4133 MHz). A submenu called “Advanced DRAM configuration” allows the user to tweak the timings of the DRAM modules. The vast majority of the users who will choose to tweak these options will stick to the six main timings, but MSI chose not to disappoint the professionals and inserted dozens of controls for DRAM sub-timings, turn-around timings, advanced timings and latency timings, as well as miscellaneous and on-die termination configuration options.
The “DigitALL Power” submenu offers access to the options of the digital CPU VRM, allowing the user to disable certain controls and protections. Regular users should leave all of these options enabled, but they might come in handy for professional overclockers and experts.


The “OC Profile” button is a simple menu that allows the users to save or load certain BIOS configurations. The BIOS supports up to six configurations but even more can be saved to USB devices. The “Hardware Monitor” remains unchanged from the EZ mode, offering the exact same number of options and features. Finally, the “Board Explorer” brings up an image of the motherboard and its rear I/O panel. The user can “explore” the board by simply moving the mouse around and details of the connected/attached device will be displayed where the pointer is. For example, if the mouse pointer is over a USB port, the BIOS will display which device is connected at this particular port.
Software
Unlike most vendors, MSI does not have an universal “App” that includes all of their software. Each and every application is a separate piece of software that can be installed or uninstalled individually. The launch screen of the supplied DVD offers five main options: Drivers, Utilities, Google, Security and System Information. The “Drivers” tab includes only the basic drivers that need to the installed for the motherboard’s devices to function properly. The “Google” tab only links to Google’s Chrome browser and the “Security” tab to a 60-day subscription of the Norton Security software. The “System Information” tab is purely informative and also includes the company’s contact information.
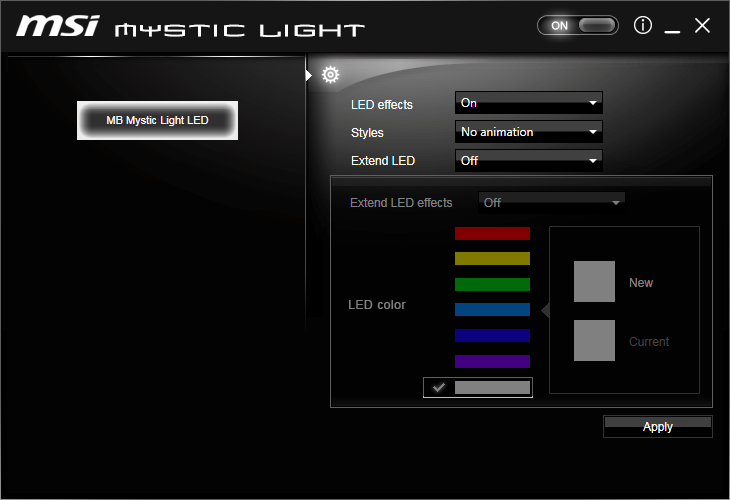
The “Utilities” tab includes software from MSI and others. Each piece of software can be individually installed or uninstalled. If, for example, you do not plan on using an RGB LED strip, there is no need to install the Mystic Light software at all.

The Mystic Light software is very simple, allowing the user to change the strip’s color and/or have it perform simple visual effects, such as breathing or flashing. There is also a “random” lighting effect option that is definitely not for everyone.
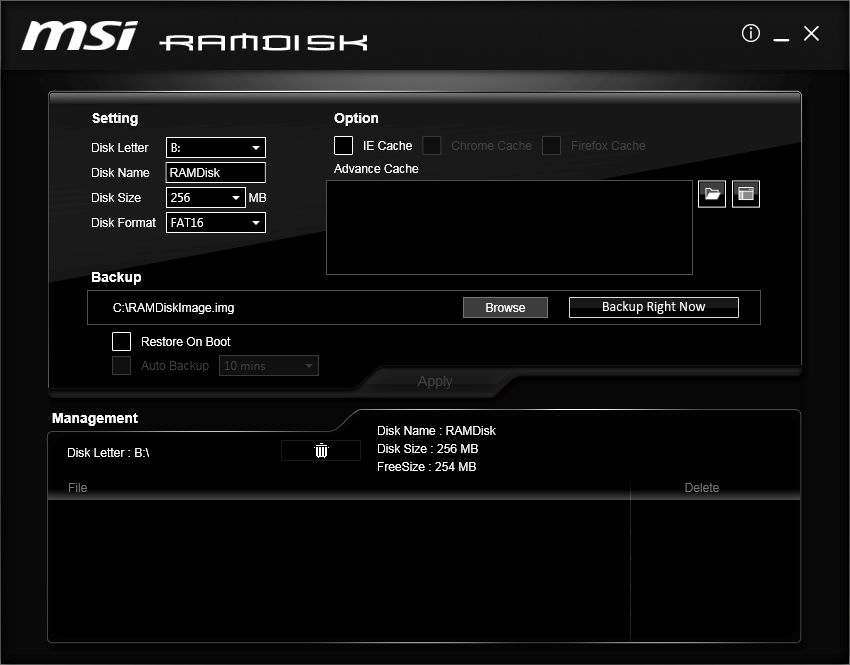
As its name suggests, the RAM Disk software can be used to easily create RAM Disks. Upon its installation, it will automatically generate a 256 MB RAM Disk. It offers the options to automatically transfer the cache of the most popular browsers to the RAM disk, allowing the browsers to become, in theory, significantly more responsive. Just be careful with sensitive data and RAM Disks; RAM Disks are temporary and data loss will be caused if something found on a RAM Disk was not backed up at the time of a forced system shutdown or freeze.
The MSI Network Manager offers basic control options for the Intel I219-V LAN controller. The Application tab allows for the bandwidth and priority control of individual applications and services. Applications can also be entirely blocked from accessing the network. The Performance tab is purely informative, with graphs showcasing the network’s usage, and the Network Test tab will perform a basic internet provider speed test towards an undefined host. The “Advanced Settings” tab includes an automatic RWIN expansion option and an IP-blocker. The IP-Blocker can be an especially useful feature for some, as it will block all traffic towards a provided list of IP addresses.


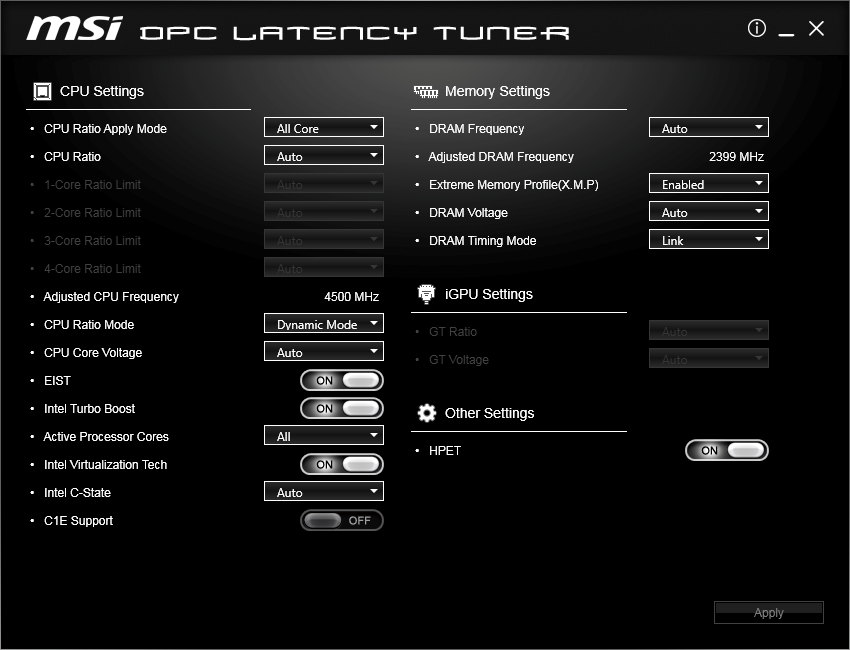
Oddly enough, the DPC Latency Tuner software mostly offers access to CPU and DRAM overclocking settings. The CPU’s ratio, voltage and main features are accessible, as are the DRAM’s frequency, voltage and timing controls. Although these options do affect the latency directly or indirectly, the DPC Latency Tuner is more of a simple and easy overclocking software than anything else.
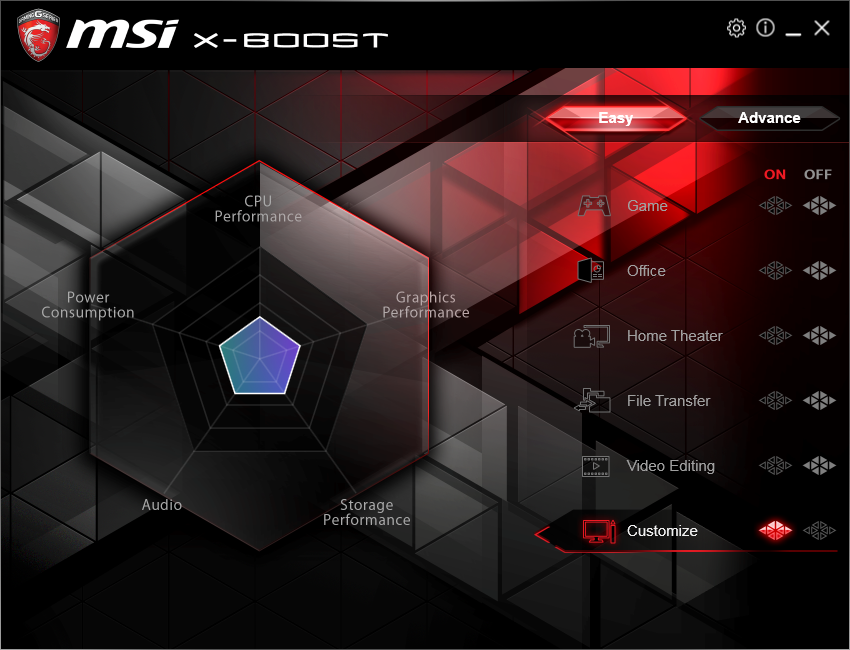
Finally, the MSI X-Boost is a vague software that can be used to “optimize” the system’s performance using predefined usage scenarios. These scenarios include “Game”, “Office”, “Home Theater”, “File Transfer” and “Video Editing”, as well as a custom mode. However, no matter what option is selected, there is no indication regarding the options/features that are being affected. The “Advance” screen is even more vague as it has even less options instead of more, allowing the users to “boost” the USB speed, the Storage speed and/or the VR speed. At this point we should mention that, during our testing, the USB 3.0 and 3.1 transfer speeds were unaffected by the status of the “USB Speed Up” option, as we already test with one CPU core already loaded.


20 Comments
View All Comments
MarkieGcolor - Tuesday, May 2, 2017 - link
I like how the asrock has a pice slot above the gpu slot. Why don't more motherboards have more space between the cpu connected slots for sli/crossfire? I'll never buy another board that doesn't have 3 slot spacing for cpu's again!HollyDOL - Tuesday, May 2, 2017 - link
Usually that top PCIe 1x slot is where my audio card gets seated. It used to be recommended due to latency, no clue whether that reason still holds though, it became quite a custom for me.ImSpartacus - Tuesday, May 2, 2017 - link
Do you actually anticipate using sli or crossfire?I'm beginning to get the feeling that they are antiquated.
tsk2k - Wednesday, May 3, 2017 - link
The distance from the top PCIe x16 slot on the MSI to the CPU is the same as ASrock.GT710M - Tuesday, May 2, 2017 - link
so much detailsATC9001 - Tuesday, May 2, 2017 - link
Why no overclocking for a comparison?BurntMyBacon - Wednesday, May 3, 2017 - link
The article specifies the MSI board's VRM circuit as a 10 phase design and the ASRock as an 8(6+2) phase design. However, visual inspection (see photo of the CPU socket area with VRM heatsink removed) reveals both boards have the same number of chokes and MOSFETs under those VRM heatsinks. I presume I must be missing something. Please explain.blacksun123 - Wednesday, May 3, 2017 - link
From the test result, ASRock's power efficiency is much much better than MSI.blacksun123 - Wednesday, May 3, 2017 - link
Does MSI provide SLI bridge for this MB? Does it really support SLI? It costs USD$25~40 to buy a SLI HB bridge in the market.zafos888 - Saturday, September 9, 2017 - link
Amazing job on the reviewCan anyone tell me the height of the heatsinks around the CPU?
I want to use a Noctua D15 cooler and I dont know if the rams will fit underneath it, so I was thinking about rotatig it so the fan will be on top of the heatsinks instead of the rams. The space under the fan is 32mm. Thanks in advance